Easy-To-Grow Indoor Herbs for Winter

The weather outside is frightful, but winter meals containing fresh herbs are so delightful!

Gardeners know that there is simply no comparison between store bought produce and food plucked straight from the garden. Homegrown fruits, vegetables, and herbs are simply more flavorful and nutritious when picked at their peak of freshness and consumed right away. This is easily accomplished during the more temperate times of the year, but what about the Winter? In colder climates, fruits and vegetables are difficult to grow during the Winter months unless you have access to a heated greenhouse. Herbs, on the other hand, are easily grown indoors and can improve the taste of everything you cook all Winter long.

Let’s Begin

For the ambitious and experienced gardener, herbs may be started indoors from seed. However, along with the seed itself, you will require some familiarity with seed-starting procedures and have on-hand basic seed-starting supplies such as a heat mat, humidity dome, and grow light. A quicker and simpler way to initiate your fresh herb adventure is to select plants in pots, already established, from your local Master Nursery Garden Center. This is the easiest choice for the new gardener and will ensure the quickest results for all herb lovers.

Let’s Choose

Any herb that can be grown in the ground may also be grown in a container; however, some herbs are more easily cultivated indoors than others. Also, it is a good idea that you base your selection of herbs on those that you tend to use the most.

Our favorites include:

Basil • Chives • Marjoram • Mint • Oregano • Parsley • Rosemary • Sage • Thyme

Let’s Grow

To grow the healthiest, freshest, and most flavorful herbs indoors, consider…

Light

Select a sunny location, the brighter, the better. A south or southwest exposure is best as plants require at least 6 hours of sunlight a day to flourish. If this situation is not possible, you may want to add an indoor grow light to supplement the natural light.

Containers

While shopping for your herb starter plants, select the containers that you will transplant your new additions into. Each herb should have its own container and each container should have drainage holes. You may also want to base your choice of decorative containers on size, your décor, and personal aesthetics.

Soil

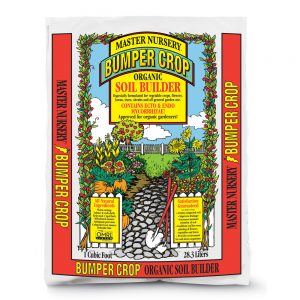
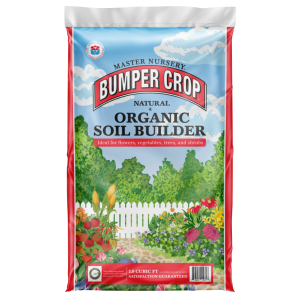
Pick up a bag of Master Nursery® Bumper Crop® Potting Soil [Eastern & Midwestern Regions | Western Region] to use for transplanting your herbs into their new containers.  Superior quality Master Nursery® potting soils have an advantage over garden soil, which can harbor pests and disease and is not suited for indoor use. Our potting soil mixes provide the perfect balance of natural and organic materials to enhance drainage, water retention, and fertility for growing healthy, tasty herbs.

Fertilizer

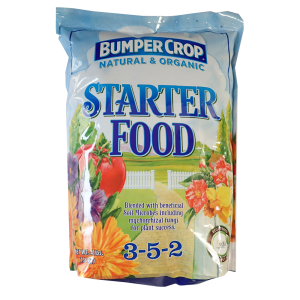
Plan to fertilize your herbs at planting time. Begin by mixing the recommended amount of Master Nursery® Bumper Crop® Starter Food or Master Nursery® Bumper Crop® All Purpose Food into your potting soil when transplanting. These natural and organic, gentle formulas will ensure that your plants receive exactly what they need to get off to the best start possible.

Water

Some herbs will prefer more water than others. This is why it is best to plant each selection in its own separate container. When choosing a pot, keep in mind that a smaller pot will dry out sooner than a larger pot and, therefore, require more frequent watering. Clay pots, because they are porous, will dry out more quickly than plastic or ceramic. Check your herbs often and water as needed. It’s a good idea to give your herbs a quick monthly shower under the faucet to wash off normal household dust, too.

Let’s Harvest

When you are ready to enjoy your herbs, simply snip what you need. Cutting often will encourage a thicker and fuller plant.

Let’s Cook

Enjoy your indoor herbs to garnish your kitchen creations. Add them to soups, stews, salads, and all manner of Winter side dishes. So easy and so tasty! Bon appétit!

Need more gardening inspiration? Click here.


Related Products

Master Nursery® Bumper Crop® All Purpose Food
Western Region
Eastern & Midwestern Regions
Master Nursery® Bumper Crop® Organic Potting Soil
Eastern & Midwestern Regions
Master Nursery® Bumper Crop® Potting Soil
Western Region

Master Nursery® Bumper Crop® Starter Food
Western Region
Eastern & Midwestern Regions

A Winter Houseplant Primer

Houseplants have the ability to brighten up any room, but harsh Winter conditions can cast a dark shadow on houseplant health. The effects of dry air, cold temperatures, shorter days, and lower light levels will all take their toll on even the most robust and easiest to care for plants. Our suggestion…. Know what you grow! Selecting the best houseplant for your environment, or adjusting your environment to suit your houseplant’s preferences, will go a long way in increasing the life and beauty of your potted pals.

Houseplants That Tolerate Low Light

Choosing low light houseplants is an ideal solution for any indoor area with reduced natural light and, in the northern hemisphere, low light levels are prevalent all Winter long. Either supplement natural light with the addition of grow lights, or grow houseplants that thrive in a dimly lit environment. Some of our favorites include:

  • Cast Iron Plant (Aspidistra)
  • Chinese Evergreen (Aglaonema)
  • Dumb Cane (Dieffenbachia)
  • Lucky Bamboo (Dracaena)
  • Peace Lily (Spathiphyllum wallisii)
  • Pothos (Epipremnum aureum)
  • Prayer Plant (Calathea)
  • Snake Plant (Sansevieria)
  • Spider Plant (Chlorophytum)
  • ZZ Plant (Zamioculcas zamiifolia)

This is just a small sampling of popular indoor plants that do well with lower light levels. Check out your local Master Nursery Garden Center for additional varieties.

Houseplants that Tolerate Low Humidity

Most houseplants originate in tropical regions. These are areas of high humidity. Home heating systems, however, rob the air of precious moisture and the longer we run our systems, the drier the air becomes. Houseplants respond with the yellowing, browning, curling and dropping of their leaves. You can increase indoor humidity by grouping houseplants together, placing them on a tray of pebbles filled with water, misting frequently, or running an air humidifier. You may also choose houseplants that originate in arid areas. These plants will be tolerant, or even happy, in a low moisture environment. Generally, plants with thick, waxy, scaly, or hairy leaves are naturally better adapted to withstand less air moisture than others. Houseplants that tolerate average and low humidity levels includes:

Low Humidity

  • Cacti
  • Succulents
  • Snake Plant
  • Wax Plant

Average Humidity

  • Cast Iron Plant
  • Chinese Evergreen
  • Dracaena
  • Peperomia
  • Pothos
  • ZZ Plant

Winter Houseplant Care Begins Before the Cold Sets In

Making sure that all of your houseplants enter the Winter months as healthy as possible is one of the most important steps in ensuring vigor and beauty. Getting them off to a good start will make a big difference in how they tolerate taxing indoor conditions. Winter houseplant care begins before the cold arrives with:

The Correct Pot.

Your houseplant will have grown quite a bit during the Summer months and will need to be repotted. When purchasing a new houseplant, you may desire a decorative pot to enhance its beauty. The pot will need to be the right size for the plant and its anticipated growth, without being too big or too small. Adequate drainage is also essential to prevent problems associated with plant roots sitting in water.

Premium Potting Mix.

Garden soil has too many contaminants to be good for houseplants; instead, choose Master Nursery® Bumper Crop® Potting Soil  [Eastern & Midwestern Regions | Western Region]. This exceptional soil blend includes natural and organic ingredients and is perfectly balanced for both water holding capabilities and drainage to help avoid under- and over-watering your houseplants.

Proper Feeding.

Houseplants need a rest in the Winter and therefore should not be fed until growth resumes in the Spring. However, to get your houseplants through the cold season as healthy as possible, it is important to add an organic, slow-release fertilizer to the soil when repotting before the Winter sets in. The best product for this important step is either Master Nursery® Bumper Crop® Starter Food or Master Nursery® Bumper Crop® All Purpose Food. Mix the recommended amount into your potting mix at transplant time for a gradual release of nutrients for houseplant Winter health.

Winter Houseplant Care Success

You selected the correct plant, container, soil, fertilizer and have taken measures to control insects. Success is in sight! Continue to monitor the health of your houseplants throughout the Winter season. Adjust watering, humidity, and light as necessary by checking your plant pals frequently. Make certain that your plants are not situated near a heating vent, will not be blasted with cold air when a door is opened, and do not lean against a cold windowpane.

Have additional questions regarding houseplants? Your local Master Nursery Garden Center is happy to help.

Need more gardening inspiration? Click here.


Related Products

Master Nursery® Bumper Crop® All Purpose Food
Western Region
Eastern & Midwestern Regions
Master Nursery® Bumper Crop® Organic Potting Soil
Eastern & Midwestern Regions
Master Nursery® Bumper Crop® Potting Soil
Western Region

Master Nursery® Bumper Crop® Starter Food
Western Region
Eastern & Midwestern Regions

Ideas for Creating Winter Interest in the Garden

Most gardeners think of it as a time of rest, but winter is the perfect time to plan next year’s winter wonderland. Take a look around you. Walk your neighborhood or a nearby arboretum. What colors, shapes, textures, and shadows do you find appealing? Consider replicating them in your yard to enjoy for many winters to come.

Winter Beauty in Your Landscape

Winter is a time of special beauty and interest. Berries sparkle on shrubs under a layer of frost and ice, while other shrubs have shades of bronze leaves that cling and rattle in winter breezes. The leafless branches of larger trees cast dramatic shadows across the freshly fallen snow. Bark hidden by the leaves of summer stands out gorgeously in the winter. Barks of silvery gray, white, green, yellow, purple or red hues add a burst of color when the landscape is covered in white. Even barks that are deeply fissured, sleek as satin, peeling in thin layers or curiously pocked by a pitted surface give interest to a wonderful winter landscape. Dried grasses stand out in stark contrast against the backdrop of dark evergreens, shaking snow off their delicate heads. There is even the surprising red, orange, and yellow ribbon-like blooms of witch-hazel, which flower in mid-winter, or the delicate lavenders and blues of tiny species of crocuses poking their heads out from under the snow. Pansies are also a great addition for late-season winter color in your flowerbeds. Everywhere you look, there can be beauty in the winter landscape.

Top Plants for Winter Interest

Many different plants offer interesting features that reach their full potential in the winter landscape. Outstanding selections include…

  • Paperbark Maple (Acer griseum)
  • Threadleaf Japanese Maple (Acer palmatum dissectum)
  • Red Chokeberry (Aronia arbutifolia)
  • Shagbark Hickory (Carya ovata)
  • Blue Atlas Cedar (Cedrus atlantica ‘Glauca’)
  • Harry Lauder’s Walking Stick (Corylus avellana ‘Contorta’)
  • Winter Daphne (Daphne odora)
  • Common Snow Drops (Galanthus nivalis)
  • Wintergreen (Gaultheria procumbens)
  • Christmas Rose (Helleborus niger)
  • Chinese witch-hazel (Hamamelis mollis)
  • Winterberry Holly (Ilex verticillata) Need female and male plant for berries
  • Christmas fern (Polystichum acrostichoides)
  • Common Camellia (Camellia japonica)
  • Heathers/Heaths

Be sure to keep a list of what plants interest you as you observe the winter landscape around you. If you can’t identify them, take a picture and head to your local Master Nursery Garden Center for identification. While you are there, be sure to pick up Master Nursery® Bumper Crop® Soil Builder [Eastern & Midwestern Regions | Western Region] This exceptional, nutrient-rich soil amender consists of high-quality, organic ingredients.  It is the perfect soil enhancer to use next spring when putting all of your new plants in the ground that are destined to create a remarkable winter wonderland to be enjoyed for many years to come.

Need more gardening inspiration? Click here.


Related Products

Master Nursery® Bumper Crop® Organic Soil Builder
Eastern & Midwestern Regions
Master Nursery® Bumper Crop® Soil Builder
Western Region
Master Nursery® Bumper Crop® Starter Food
Western Region
Eastern & Midwestern Regions

Pet-Friendly Houseplants

Houseplants and pets make a house a home; however, some popular houseplants can be harmful to our precious pets. Fortunately, there are plenty of beautiful, pet-friendly houseplants that can create the ambiance you crave and are safe for your furry friends.

Favorite Pet-Friendly Houseplants

There are a variety of plants, ranging from easy-care for beginners to the more challenging for experienced growers, that are pet-safe, excellent choices, suitable for homes with both dogs and cats include…

  1. Spider Plant– A great plant for beginners because of its forgiving nature, the spider plant may have either striped or plain foliage that cascades in elegant curves. This easy-care plant looks best when hung or may be perched on a pedestal for a similar effect.
  2. Ponytail Palm– While this palm-like plant is actually part of the agave family, it is an excellent air purifier and its long, slender foliage adds welcome variety to a houseplant grouping. This plant prefers full sun and can grow up to four feet tall indoors.
  3. African Violet– A classic blooming houseplant with rich purple, pink, magenta, white, and bicolor flowers and broad, velvety leaves, the African violet is a pet-friendly favorite. These colorful plants are compact, making them great for smaller spaces in the urban jungle.
  4. Boston Fern– The delicate, feathery foliage of the Boston fern prefers filtered light and a higher humidity environment, making it great in bathrooms. Hang the plant to show off its foliage or perch it on top of a bookshelf or pedestal instead.
  5. Wheat Grass– Also called cat grass or pet grass, is a lawn-like houseplant that is fun for pets to nibble. While wheat grass is relatively easy to grow, it does require regular “mowing” with appropriate shears to stay full and lush.
  6. Cast Iron Plant– This extremely hardy plant is great for beginners and tolerates all types of neglect, including low light, low humidity, and irregular watering. This makes it a wonderful houseplant for the new plant parent or anyone who may find it difficult to offer scheduled care.
  7. Polka Dot Plant– The colorful splashes of pink or white on this plant’s foliage make it a bright addition to any houseplant collection, and it can be a pet-friendly alternative to the highly toxic poinsettia during the holidays. Bright, indirect light is best to help this plant keep its fun coloration.
  8. Bromeliad– These bold plants have colorful blooms and dramatic foliage, making them favorite statement pieces in the home or office. Bright light will help bring out their color, and humidity should be kept between 40 to 60%.
  9. Prayer Plant– The colorful, striped foliage of the prayer plant, plus its unique habit of “folding” its foliage at night, make it a houseplant favorite. Bright, indirect light and high humidity will help keep this plant healthy and lush.
  10. Peperomia– There are more than 1000 varieties of peperomia, not all are readily available, but all are easy-care and pet-safe plants. Small in stature, they are an excellent choice for placing on a nightstand, shelf, or desk. Peperomia prefer a medium to low light location out of direct sunlight. Allow the potting soil to become dry between waterings.

Protecting Your Houseplants from Pets

It’s important to remember that even if a houseplant is considered pet-friendly, pets that nibble on the foliage may have some digestive trouble, particularly if they were to eat a large quantity of the plant. Furthermore, pets can stress plants by tipping pots, laying on the plant, digging in the dirt, or otherwise disturbing the plant. For the safest relationship between your houseplants and your pets, you can take several steps to help them get along.

  • Position houseplants out of reach of pets, or in a room where pets are not permitted to enter.
  • Train pets to leave houseplants alone and reinforce that training whenever necessary.
  • Use heavier clay, concrete, or ceramic pots that pets will be unable to easily tip.
  • Use stones as a top dressing so pets are unable to dig in the plant’s soil.
  • Spray the pot or foliage with bitter apple or other safe pet repellant sprays if needed.

To keep all of your precious houseplants healthy and looking their best, be sure to pot-them-up using Master Nursery® Bumper Crop® Potting Soil.  Choose the product for your region:

EASTERN & MIDWESTERN REGIONS:  Bumper Crop® Gardener’s Gold Organic Potting Soil is good for all outdoor and indoor container plants! It is a blend of sphagnum peat moss, composted hen manure, shellfish, perlite, and very old dark bark. It is also pH adjusted with lime, as needed. This product is perfectly suited for houseplants and all general garden planting. Gardener’s Gold Organic Potting Soil is a rich, earthy blend made with natural and organic ingredients with a special water-saving formula.

WESTERN REGION:  Bumper Crop Natural & Organic Potting Soil is a premium blend of natural and organic ingredients that are perfectly balanced for both water-holding capabilities and drainage. It is an excellent potting soil for both indoor and outdoor use in all container types and sizes.  This special natural and organic potting soil offers a blend of high-quality ingredients including earthworm castings, bat guano, and kelp.

When repotting your houseplants, it’s a great idea to add a little Master Nursery® Bumper Crop® All Purpose Food to your potting soil. This organic, all-purpose plant food is non-burning and will give your houseplant transplants a healthy start in their new dwelling.

Houseplants can be just as much a part of your family as any four-legged, furry family members, and by choosing pet-friendly houseplants, your pets can get along with your urban jungle just fine.

Need more gardening inspiration? Click here.


Related Products

Master Nursery® Bumper Crop® All Purpose Food
Western Region
Eastern & Midwestern Regions
Master Nursery® Bumper Crop® Organic Potting Soil
Eastern & Midwestern Regions
Master Nursery® Bumper Crop® Potting Soil
Western Region

Growing Agave

Native to the Americas, dramatic Agave is the perfect companion for the California landscape. Along with its striking leaves and architectural form, Agave is astonishingly drought tolerant and fire-resistant, important qualities for west coast landscape plants.

About Agave

Although leaf shape and color may vary, Agave leaves always radiate from a central point in a symmetrical rosette. The leaves are succulent and, most often, pointy at the tip. Some varieties have smooth leaves while others possess leaves with teethed margins. Leaf color can range from deep green to bluish green to silvery blue to gray. Some varieties offer variegated leaves with yellow or white lines or edges. Agave is also available in a wide-ranging assortment of sizes from impressively enormous to dainty and small.

Grown primarily for its distinguished appearance, Agave does flower. The flower stalks tend to be imposing compared to the overall size of the plant, and it may take years, even decades, for an Agave to bloom. Flowers may be branched, similar to a tree, or unbranched. The flowers will form seed pods or bulbils, necessary for reproducing the plants. Once an Agave flowers, the main plant will die. But the plant leaves behind clones for propagating new Agaves. You may prevent Agave from flowering by cutting off the flower stalk as it begins to form. Agave flowers are an important source of nectar for pollinators such as hummingbirds and bees.

Growing Agave

Whether grown as a specimen or grouped in drifts in the landscape, Agave requires a full sun site – direct sun – and prefers a low humidity environment. Poor soil is not a problem, and Agave can tolerate nutrient deficient soil quite well once established. Give your Agave a good start by amending the native soil with Bumper Crop® Natural & Organic Soil Conditioner. This will help increase drainage, as sharp drainage is essential. Adding gravel or chicken grit to the planting area is also helpful. Fertilize lightly with Bumper Crop® Natural & Organic Starter Food. Although succulent, and therefore drought tolerant, watering of Agave is infrequent but occasionally necessary, more so for potted plants than those in the ground.

Types of Agaves

With Agave, there seems to be an unlimited selection of colors, shapes, forms, and sizes. Stop by your local Master Nursery® Garden Center to sample their offerings.

With so very many Agaves to choose from, it is hard to select our favorite varieties. But here we go…

  • American Century Agave

Its large size, 6 to 12 feet high, and narrow, long, wavy leaves make this an irresistible Agave for the west coast landscape. With desirable blue-green foliage, this Agave is exceptionally winter hardy to the low teens.

  • Blue Agave

Blue Agave is where tequila comes from. As the name implies, this Agave has beautiful blue foliage, and it can grow an impressive 8 feet high by 8 feet wide.

  • Mountain Agave

This lovely, apple-green agave with reddish-brown teeth grows up to 4 feet tall and 5 feet wide. Mountain Agave prefers full sun but will tolerate a part shade location and will grow best in soil that is well-drained, rich in organic matter, and regularly irrigated.

  • Queen Victoria Agave

A most beloved dark-green, toothless Agave of manageable size, about 18 inches in diameter. The leaves sport attractive white markings on their sides and have a spike at their tip.

  • Fox Tail Agave

A lovely, slow-growing Agave that will eventually grow to 4 feet high and looks like a blossoming flower with graceful, undulating, silvery-green leaves. The leaves have no teeth or terminal spine, making this Agave a dream to plant and care for. This Agave will tolerate moist or dry, well-drained soil.

Astonishing, dramatic, colorful, easy-care Agave will make a spectacular statement in your dry west coast garden. Have fun experimenting with new and exciting varieties.

Need more gardening inspiration? Click here.


Related Products

Master Nursery® Bumper Crop® Soil Conditioner
Western Region
Master Nursery® Bumper Crop® Starter Food
Western Region
Eastern & Midwestern Regions

Tulip Time

It’s finally here, that time of year that we’ve all been anticipating – fall! And, you know what fall means? Tulip time!

The cooler days of fall entice us back into the garden that the August heat forced us to abandon. This is when your local Master Nursery® Garden Center is brimming with fresh, new, seasonal plant material and overflowing with fall-planted, spring-flowering bulbs. And, we wish to point out, that no bulb type is more treasured than the tulip. With an almost limitless selection (100 species and over 3000 varieties divided into 15 distinct groups), you’ll never tire of the tulip.

Tips for Planting Tulips

Tulips are an easy-care addition to any garden or landscape, and they are simpler to plant than many gardeners realize. Tulips need cold winters to stimulate blooms. They flower effortlessly and, in most cases, return for many years in USDA Hardiness Zones 3 – 7. Tulips may be grown in Zones 8 – 11 with a pre-chilling period of 10-14 weeks at 35 to 45°F. In these warmer climates, tulips are treated as annuals.

Tulip 10 Step

  1. Choose only top-sized, firm bulbs without bruises or obvious damage. Bigger bulbs generally indicate better quality and will provide more and larger flowers.
  2. Bulbs should be planted as soon as purchased, otherwise store them in a cool, dry location until ready to plant. Plant tulip bulbs before the ground freezes. When planting in Zones 8 – 11, store bulbs at 35 to 45°F until planting time.
  3. Choose a full or part sun location to plant tulips. A semi-shady location provides some relief from the heat in Zones 8 – 11.
  4. If planting a large number of bulbs, consider digging a free-form bed or trench in which to plant. Individual holes are appropriate when planting a small number of tulips.
  5. Planting beds and holes should be well-draining and the soil enriched with plenty of Master Nursery® Bumper Crop® Soil Builder [Eastern & Midwestern Regions Western Region].
  6. Plant tulips at the depth of three times the height of the bulb, approximately 6 inches deep.
  7. Always plant pointed end up.
  8. Apply a generous amount of bone meal at planting time.
  9. Backfill with the excavated, amended soil.
  10. Water the planting area thoroughly and mulch generously after planting tulip bulbs.


Tried & True Tulip Selections

Some tulips can be a little finicky, and while these may disappear from your garden after a year or two, other selections promise trouble-free blooms for years to come if planted and cared for correctly. Proper bulb planting starts with amending your soil with Master Nursery® Bumper Crop® Soil Builder [Eastern & Midwestern Regions Western Region] to ensure a healthy and nutritious planting environment with excellent drainage.

Species Tulips
Species Tulips are by far the longest-lived tulips and will even naturalize when given advantageous growing conditions. Small in stature, species tulips are an excellent choice for rock gardens and for planting in the front of beds and borders.

Darwin Hybrids
Darwin Hybrids perennialize quite well and are valued for their long-stemmed and large brightly colored flowers available in a wide range of hues. These mid-season bloomers make excellent cut flowers.

Emperor Tulips
Emperors are also good perennializing tulips. These modern hybrids are known for their substantial, elongated blooms borne on tall stems. Some even boast decoratively patterned and mottled foliage.

The temps are cooler, the garden is waiting, and your local Master Nursery® Garden Center is ready for you. So, what are you waiting for? Take advantage of tulip time and prepare for a bright and floriferous spring!

Need more gardening inspiration? Click here.


Related Products

Master Nursery® Bumper Crop® Organic Soil Builder
Eastern & Midwestern Regions
Master Nursery® Bumper Crop® Soil Builder
Western Region

Colorful Winter Pansies

Don’t let their subtle size fool you; winter pansies are tough, cool-weather plants that bloom for six or more consecutive months, from the beginning of fall until the end of spring, adding much-needed color to an otherwise stark winter landscape.

Places to Plant 

Pansies bloom in an array of colors to suit every taste. Often the petals are multi-colored with curious splotches, blotches, and markings that add a touch of whimsicality to the garden.

Versatile pansy blossoms may be used to brighten most areas of the winter garden. Adding a graceful drift of lively pansies to the front of an often-viewed bed or border will reinvigorate the winter landscape. Plant pansies under a tree, along a fence or pathway, and atop a stone wall to bring the dainty yet unusual flowers closer to the eye. Try tucking pansy plants into garden beds around spent perennials and shrubs. They are sure to brighten up a lackluster section of the garden landscape. Plant pansies anywhere that you will have occasion to enjoy their beauty and color all through the coldest months of the year.

Guess what? Winter pansies perform well in containers too! Mix them with dwarf shrubs or semi-evergreen perennials in planters placed on a deck, patio, or next to the front door to greet your guests with their array of welcoming hues. Or you may simply stuff a window box or hanging basket full of pansies to create an explosion of color.

Pretty Pansies

There is little difference between the pansies labeled as “winter” pansies and those labeled “spring” pansies. Pansy varieties sold in the autumn, however, are bred to be the most cold-tolerant and should be planted early in the fall to give them time to establish strong roots and shoots before a hard frost hits. When fall-planted, pansy plants are larger, more robust, and floriferous come spring than those planted in the springtime.

There are numerous varieties of gorgeous winter pansies available in the fall; some popular ones are:

  • Matrix Series 

This series of winter pansies come in an assortment of colors that range from solid- to multi-colored, and from no markings to pretty little faces on heart-shaped petals. These plants have excellent branching, able to support an abundance of blooms.

  • Cool Wave Pansies   

Super cold hardy, Cool Wave Pansies produce an abundance of colorful, medium-sized blooms on a vigorous spreading plant, making them the perfect choice for filling hanging baskets and planters or as a ground cover.

  • Clear Mix Panola

Panola pansies are a cross between a pansy and violas, giving this series excellent cold hardiness, large flowers, and a high bloom count. These prolific bloomers are perfect for decorating beds, borders, and containers.

Practical Pansy Planting

Did you know that winter pansies, as with most annuals and perennials, perform their best if planted in soil that is rich in high-quality compost and fed with a well-balanced fertilizer that will promote blossoms?

  • Ground Planting

In the fall, choose a well-drained planting location in full sun, part sun, or part shade. Work in 4-6 inches of Master Nursery® Bumper Crop® Soil Builder [Eastern & Midwestern Regions Western Region]. Plant pansies at the same level, or slightly higher, than they were growing in their market packs, taking care not to plant too deep or the plants may rot. Place plants about 4 – 6 inches apart. Apply Master Nursery® Bumper Crop® Rose and Flower Food after planting, mulch, and water the bed thoroughly. Remember to check the plants often during the first three weeks after planting, or until new growth begins, to ensure adequate moisture necessary for healthy development.

  • Container Planting

When planting winter pansies in containers, the instructions are the same as when planting directly into the ground, except, it is better to use Master Nursery® Bumper Crop® Potting Soil [Eastern & Midwestern Regions Western Region]. This lightweight, rich potting soil, loaded with compost, is the perfect soil for all container-grown plants. The soil in containers tends to dry out more quickly than soil in the ground. It is important to pay attention to container soil moisture levels in the fall as the winter pansies work to produce strong roots to sustain them through the cold months.

Pansy Maintenance
Minimal maintenance is necessary for winter pansies to reach their full potential.

Deadheading, removing spent blooms, is helpful as it stimulates the plant to produce abundant blossoms. Clipping out any dried foliage will keep pansy plants looking their best.

Whether scattered amongst the seasonal chrysanthemums and ornamental cabbage & kale or tucked into window boxes and containers, easy-care winter pansies add color and whimsy to the late-season landscape straight through to spring.

Need more gardening inspiration? Click here.


Related Products

Master Nursery® Bumper Crop® Organic Soil Builder
Eastern & Midwestern Regions
Master Nursery® Bumper Crop® Organic Potting Soil
Eastern & Midwestern Regions
Master Nursery® Bumper Crop® Rose and Flower Food
Western Region
Eastern & Midwestern Regions

Master Nursery® Bumper Crop® Potting Soil
Western Region

Ornamental Cabbage & Kale

Looking to add extra appeal to the fall and winter landscape? This year, try ornamental cabbage and kale! Planted alongside chrysanthemums and winter pansies, ornamental cabbage and kale add distinctive bold texture and vibrant seasonal color to the late-season landscape.

Foliage Not Flower

Frequently called ‘flowering’ cabbage & kale, these fall favorites are not flowers at all, but large, dense rosettes of colorful, frilly foliage richly variegated with cream, white, green, pink, rose, and purple – the perfect fall palette.

  • Kale leaves are frilly-edged and sometimes deeply cut or lobed.
  • Cabbage leaves tend to have a smoother appearance with a wavy leaf edge.

While the typical large ornamental cabbage and kale varieties are readily available at this time of year, you can also try more unusual options, including dwarf varieties suitable for planters, and upright, tall, long-stemmed varieties that are useful in fall floral arrangements.

Unlike most other fall ornamentals, these cold-tolerant annuals improve in appearance after a frost or two, bringing out more intense and brilliant colors in their foliage – perfect for use as both an autumn accent plant mixed with other fall favorites or as a specimen plant, commanding all the attention. Initially select your ornamental cabbage and kale for the leaf texture as the true leaf color will not be recognized until after temperatures have cooled down quite a bit.

Our favorite tried and true varieties include:

Cabbages

  • Color Up

Grows upright with green leaves surrounding a center of white, pink, or magenta.

  • Osaka Cabbage

A compact plant with large, smooth, wavy leaves boasting a center of white, pink, or jewel-toned purple.

Kales

  • Crane

When grown close together, Crane is a tall variety, perfect for cutting and using in floral arrangements

  • Peacock

This extra fancy variety sports deeply cut, frilly, loose leaves in purple, magenta, and white.

Planting 

Popular in fall borders, grouped in planting drifts, or planted in containers for the deck or patio, ornamental cabbage and kale typically grow to 12-18” high and wide, depending on the cultivar. Plant these fall jewels in September and early October, at least 12” apart, depending on the variety, in an area with full sun that has rich, moist, well-drained soil.

  • In Ground 

If planting in the ground, add a shovel full of Master Nursery® Bumper Crop® Soil Builder [Eastern & Midwestern Regions Western Region] to each planting hole to enrich the native soil. Also, sprinkle in a small handful of Master Nursery® Bumper Crop® All Purpose Food to help your plants thrive through the fall, winter, and into spring.

  • In Containers

When planting in pots, planters, urns, and window boxes, it is best to plant using lightweight, nutritious potting soil. Of course, we recommend Master Nursery® Bumper Crop® Potting Soil [Eastern & Midwestern Regions Western Region] along with a sprinkling of  Master Nursery® Bumper Crop® All Purpose Food for happy, healthy plants all season long.

Cabbage and Kale Tip

While these plants are quite similar to the cabbage and kale cooked in the kitchen and consumed in salads, soups, and stews, it is important to note that ornamental varieties are cultivated for color and shape rather than taste. If you’d like to use them in the kitchen, use them as a garnish only. They are more attractive than tasty, and their proper place is in the garden.

Enjoy your ornamental cabbage and kale during the cold months of the year as once they begin to bolt in the spring, sending up their flower stalks, it is time to pull them up and replace them with late spring and summer flowering annuals. This fall, however, try several new varieties planted in both containers and directly into the garden. You’ll love the long-lasting color that they’ll bring to your surroundings.

Need more gardening inspiration? Click here.


Related Products

Master Nursery® Bumper Crop® All Purpose Food
Western Region
Eastern & Midwestern Regions
Master Nursery® Bumper Crop® Organic Potting Soil
Eastern & Midwestern Regions
Master Nursery® Bumper Crop® Organic Soil Builder
Eastern & Midwestern Regions

Master Nursery® Bumper Crop® Potting Soil
Western Region
Master Nursery® Bumper Crop® Soil Builder
Western Region

Early Spring Blooming Perennials

During a long and dreary winter, it seems next to impossible that your cherished flowerbeds will ever burst into life again. Early spring perennials, however, are precious proof that winter is on its way out; some can even bloom in bright, cheerful colors right through lingering snow. Yet, we frequently forget early spring perennials as we are often overcome with the bold, familiar bulb displays of tulips, daffodils, hyacinths, and more. This is unfortunate, because many of these perennials have a subtle charm that complement bulbs and shrubs, which bloom in early spring, and they add even more variety, texture, and color to your landscape.

Perennials for Early Spring Blooms

When choosing the best plants to create a stunning early spring display, the USDA Hardiness Zone and the amount of sun or shade the location receives are both critical factors for the plants’ success. However, another, often overlooked, crucial element for plant success is the plants’ soil requirements. Let’s break this down.

For a full to part sun location, opt for…

  • Columbine (Aquilegia spp.) Zones: 3 – 9  Soil: Rich, moist yet well-drained
  • Sea Thrift (Armeria maritima) Zones: 4 – 8   Soil: Lean, sandy
  • Yellow Alyssum (Aurinia saxatilis) Zones: 4 – 7   Soil: Sandy well-drained, average fertility
  • Leopard’s Bane (Doronicum orientale) Zones: 4 – 8   Soil: Consistently moist but not soggy, humus rich
  • Mountain Pinks (Phlox subulate) Zones: 5 – 9   Soil: Rich, evenly moist but well-drained
  • Pigsqueak (Bergenia cordifolia) Zones: 3 – 8   Soil: Rich, moist yet well-drained
  • Rockcress (Aubrieta spp.) Zones: 5 – 7   Soil: Sandy, rocky
  • Candytuft (Iberis sempervirens) Zones: 3 – 8   Soil: Lean, well-drained, gravelly
  • Wall Cress (Arabis caucasica) Zones: 4 – 7   Soil: Lean, sandy, or gritty
  • Primrose (Primula spp.) Zones: 2 – 8   Soil: Slightly acidic, rich, moist yet well-drained

For a part to full shade location…

  • Pasqueflower (Pulsatilla vulgaris) Zones: 4 – 8   Soil: Well-drained, sandy
  • Corydalis (Corydalis spp.) Zones: 5 – 7   Soil: Rich, moist yet well-drained
  • Bleeding Heart (Dicentra spectabilis) Zones: 2 – 9   Soil: Rich, moist yet well-drained
  • Siberian Bugloss (Brunnera macrophylla) Zones: 3 – 8   Soil: Rich, moist yet well-drained
  • Virginia Bluebells (Mertensia virginica) Zones: 3 – 8   Soil: Sandy, evenly moist
  • Lungwort (Pulmonaria spp.) Zones: 3 – 8   Soil: Rich, well-drained
  • Forget-Me-Not (Myosotis) Zones: 5 – 9   Soil: Rich, moist, well-drained
  • Woodland Phlox (Phlox divaricata) Zones: 3 – 8   Soil: Rich, moist yet well-drained
  • Creeping Phlox (Phlox stolonifera) Zones: 5 – 9   Soil: Rich, moist yet well-drained
  • Hellebores (Helleborus spp.) Zones: 3 – 9   Soil: Rich, moist yet well-drained, will tolerate dry soil once established

Planting Early Spring Blooming Perennials

When you choose which early spring bloomers to add to your landscape, consider the plants’ overall mature size, soil requirements and both watering and fertilizing needs to be sure they can reach their full potential. If you choose to plant them in fall, take extra care to protect tender roots and give them time to thoroughly establish themselves before the first hard freeze.

Planting Tips

When fall planting your early spring blooming perennials, or when planting them at any other time of the year, it is wise to use Master Nursery® Bumper Crop® Soil Builder [Eastern & Midwestern Regions | Western Region]. This exceptional addition to your native soil will help your plants establish, grow, bloom, and thrive to their full potential.

Fertilizing Tips

At planting time, fertilize your perennials with Master Nursery® Bumper Crop® Starter Food.

This natural and organic fertilizer is formulated to help newly transplanted plants develop strong roots and sturdy growth.  It is gentle and non-burning and safe to use with even the most tender early blooming perennial transplants.

Mulching Tips

It is important to mulch when planting early spring blooming perennials, this will help with weed suppression and soil moisture retention. Be sure to add an additional layer of mulch, once the ground freezes to help protect the new plants through their first winter and to help prevent frost heaving in the spring.

Depending on their size, light, and soil preferences, early spring blooming perennials may be used in flower beds, landscape borders, naturalized in woodland gardens, planted along woodland edges, and more. Be sure to plant a few of your favorites where you’ll have a good view of their exquisiteness from indoors where you’ll be able to enjoy their early blooms even if it’s a bit too cold to be outdoors!

Need more gardening inspiration? Click here.


Related Products

Master Nursery® Bumper Crop® Organic Soil Builder
Eastern & Midwestern Regions
Master Nursery® Bumper Crop® Soil Builder
Western Region
Master Nursery® Bumper Crop® Starter Food
Western Region
Eastern & Midwestern Regions

Forcing Bulbs for the Holidays and Beyond

Blooming baskets and pots of brightly colored forced bulbs make a fabulous holiday or winter gift for others and for ourselves. What better way to dress up the holiday home and add cheer to a long, cold winter, reminding us of the impending spring explosion of color and bloom?

The forcing process should begin in September or early October if you want the bulbs to be blooming for gift giving in late November or December. If you are starting late, no worries, just print these easy instructions to give with your potted bulbs and let the recipient do the rest. Or you may also pot up amaryllis and paperwhites, requiring no chill period, for quick and easy blooms.

Forcing Bulbs in 10 Easy Steps

  1. Count backwards from the desired bloom date the number of weeks required for “bloom” plus the number of weeks required for “cooling”. This will establish your planting date.
  2. Select a container that has drainage holes and is at least three times as tall as the unplanted bulb as the roots will need plenty of room to grow.
  3. Moisten your Master Nursery® Bumper Crop® Potting Soil [Eastern & Midwestern  Regions | Western Region] in a tub until it is just moist but not sopping.
  4. Mix a small amount of Master Nursery® Bumper Crop® Starter Food evenly into your potting soil to help your bulbs develop a strong root system thus giving you a healthy, vibrant, well-blooming plant.
  5. Fill enough of your container with potting soil so that when the bulb is placed on top of the soil the tip of the bulb sits slightly above the lip. Very small bulbs like crocus, dwarf iris, and grape hyacinth are the exception as they will be covered completely with about ½ to 1 inch of potting soil.
  6. Place your bulbs on top of the soil. Keep them close without touching each other or the container.
  7. Continue to fill the area between the bulbs with soil. Fill until slightly below the lip of the container allowing the tip of the pointed bulb to be exposed.
  8. Water the soil gently, allowing the excess to drain.
  9. Refrigerate potted bulbs for the appropriate amount of time at a temperature between 32- and 40-degrees Fahrenheit. Check frequently and water as necessary to keep the soil moist. Note: Both Amaryllis and Paperwhites do not require cold treatment.
  10. Gradually acclimate planted bulbs to a warm, bright location when their required cooling time has been completed. Move back out of direct sun and into a cooler location when the bulbs finally flower to prolong the blooms. Be sure to rotate your containers frequently to provide even sunlight and to produce straight stems.
Bulb Weeks Cold Treatment Weeks to Bloom
Amaryllis None 6 – 8
Crocus 8 – 10 2 – 3
Dutch Hyacinth 10 – 14 2 – 3
Dwarf Iris 10 – 12 2 – 3
Grape Hyacinth 8 – 10 2 – 3
Narcissus/Daffodil 14 – 18 4 – 5
Paperwhites None 3 – 5
Tulip 14 – 16 4 – 5

Post Bloom

After flowering, cut back flower stems and place your containers back in full sun. Continue to water until the foliage dies back naturally. When the foliage is completely spent, place containers in a cool, dry place until early next fall when the bulbs may be safely planted into the garden. Forced bulbs may be planted naturally outdoors after blooming but cannot be forced a second time. Paperwhites will never bloom again and should be discarded after forcing. Previously forced bulbs, after planting in the ground, may skip a year’s bloom but will eventually return to their former beauty and regular schedule.

Need more gardening inspiration? Click here.


Related Products

Master Nursery® Bumper Crop® Organic Potting Soil
Eastern & Midwestern Regions
Master Nursery® Bumper Crop® Potting Soil
Western Region
Master Nursery® Bumper Crop® Starter Food
Western Region
Eastern & Midwestern Regions

Success with Shade Trees

Are you considering adding a shade tree to your landscape? The benefits of trees are innumerable and include oxygen production, pollution filtering, soil stabilizing, and environmental noise reduction to name a few. Shade trees, in particular, will increase the value of your property while enhancing the beauty of your surroundings.

Did you know that Fall is the best time of year to add a new tree to your landscape? Autumn planting will allow a tree time to acclimate to its new environment and establish fresh roots at a time of year when the soil temperature is still warm and soil moisture is consistent, long before the heat and drought of summer sets in again. We are here to let you know that successful shade tree planting is easier than you think.

TREE PLANTING TIPS FOR SUCCESS

Selection

  • The Arbor Day Foundation has compiled a list of the Top 10 Shade Trees that will help you begin your search for the perfect one. These are not the only shade trees available, however, and, of the trees listed, some may be more suitable to your location than others. Select an appropriate shade tree with the help of your local Master Nursery® Garden Center. Their educated and experienced staff will guide you in choosing the perfect shade tree that will perform well in your area, that will not outgrow its allotted space, and will provide you with the aesthetics that you desire.
  • Be aware that bigger is not better. Whether containerized or balled and burlapped, makes sure that the tree you select is a manageable size to handle. Research shows that, with all else being equal, a smaller sized newly planted tree grows more quickly than a newly planted large one. The two will almost eventually even out.
  • You should also know that it is best to plant as soon as possible after purchasing to minimize stress to the tree. If planting must be delayed, keep the root ball moist until planting time. Remember to never pull, carry, or move a tree by its trunk. This will cause damage to the root system.

Preparation

  • Soil preparation is arguably the most important yet easiest aspect of proper tree planting and will guarantee the health and longevity of your shade tree. When soil is amended correctly with Master Nursery® Bumper Crop® Soil Builder [Eastern & Midwestern Regions | Western Region], water drainage is increased while soil nutrition and suitable water holding capacity is greatly improved.
  • Dig your planting hole twice as wide but no deeper than the plant’s root ball or container. Mix Master Nursery® Bumper Crop®Soil Builder [Eastern & Midwestern Regions | Western Region] into the excavated soil, creating a 70/30 soil/Bumper Crop blend.
  • Mix the recommended amount of Master Nursery® Bumper Crop® Starter Food into the excavated soil mixture. This non-burning, organic fertilizer with mycorrhiza will help the plant develop long, strong roots to ensure good health over the life span of the tree.
  • If containerized, gently and carefully remove your tree by squeezing the pot, all around, allowing the plant to easily slide out of it. If the tree is root bound and difficult to remove, you may cut the container away with pruning shears before centering it in the planting hole. Be sure to loosen the roots of a pot bound plant so that they do not continue to grow in a circular fashion which will eventually lead to root strangulation.
  • If the plant is balled and burlapped, place and center it in the planting hole then cut and remove all twine from the root ball and trunk. Burlap may be left in the hole, however, it should be loosened and pulled away from the tree trunk and tucked below the soil surface to decompose naturally over time. Placing some of the 70/30 soil mixture in the hole will help stabilize your plant while you adjust its position to your liking.

Planting

  • After positioning your new tree, backfill the hole entirely with the reserved 70/30 soil/Bumper Crop mixture, gently firming as you do until the soil is level with the surrounding ground. With the excess soil, create a ring around the edge of the planting hole to act as a saucer that will help prevent water run-off when watering.

Watering

  • Water the planting area thoroughly with a slow soaking drip. Apply a 3-inch layer of mulch around your new shade tree,keeping it about 3 inches away from the trunk to prevent rot. The addition of mulch will aid in conserving soil moisture.
  • For at least the first several months after planting, continue to keep the planting area of your new shade tree moist but not wet by using a slow drip or soaker hose. Do not allow your tree to experience drought within the first year after planting. If Mother Nature does not provide adequate rainfall each week during the first year, you will have to supplement water during this critical time when the tree is developing new roots.

A shade tree will bring you years of beauty and enjoyment while adding value to your home.  These simple instructions, along with the inclusion of Master Nursery Bumper Crop Products and the expert advice from your Master Nursery® Garden Center, will ensure your success in the planting, health, and longevity of your shade tree.

Need more gardening inspiration? Click here.


Related Products

Master Nursery® Bumper Crop® Organic Soil Builder
Eastern & Midwestern Regions
Master Nursery® Bumper Crop® Soil Builder
Western Region
Master Nursery® Bumper Crop® Starter Food
Western Region
Eastern & Midwestern Regions