Blooming baskets and pots of brightly colored forced bulbs make a fabulous holiday or winter gift for others and for ourselves. What better way to dress up the holiday home and add cheer to a long, cold winter, reminding us of the impending spring explosion of color and bloom?
The forcing process should begin in September or early October if you want the bulbs to be blooming for gift giving in late November or December. If you are starting late, no worries, just print these easy instructions to give with your potted bulbs and let the recipient do the rest. Or you may also pot up amaryllis and paperwhites, requiring no chill period, for quick and easy blooms.
Forcing Bulbs in 10 Easy Steps
- Count backwards from the desired bloom date the number of weeks required for “bloom” plus the number of weeks required for “cooling”. This will establish your planting date.
- Select a container that has drainage holes and is at least three times as tall as the unplanted bulb as the roots will need plenty of room to grow.
- Moisten your Master Nursery® Bumper Crop® Potting Soil [Eastern & Midwestern Regions | Western Region] in a tub until it is just moist but not sopping.
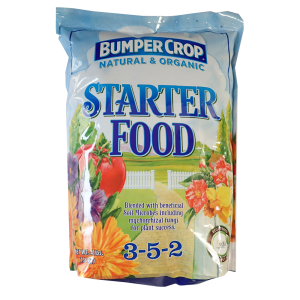
- Mix a small amount of Master Nursery® Bumper Crop® Starter Food evenly into your potting soil to help your bulbs develop a strong root system thus giving you a healthy, vibrant, well-blooming plant.
- Fill enough of your container with potting soil so that when the bulb is placed on top of the soil the tip of the bulb sits slightly above the lip. Very small bulbs like crocus, dwarf iris, and grape hyacinth are the exception as they will be covered completely with about ½ to 1 inch of potting soil.
- Place your bulbs on top of the soil. Keep them close without touching each other or the container.
- Continue to fill the area between the bulbs with soil. Fill until slightly below the lip of the container allowing the tip of the pointed bulb to be exposed.
- Water the soil gently, allowing the excess to drain.
- Refrigerate potted bulbs for the appropriate amount of time at a temperature between 32- and 40-degrees Fahrenheit. Check frequently and water as necessary to keep the soil moist. Note: Both Amaryllis and Paperwhites do not require cold treatment.
- Gradually acclimate planted bulbs to a warm, bright location when their required cooling time has been completed. Move back out of direct sun and into a cooler location when the bulbs finally flower to prolong the blooms. Be sure to rotate your containers frequently to provide even sunlight and to produce straight stems.
| Bulb | Weeks Cold Treatment | Weeks to Bloom |
| Amaryllis | None | 6 – 8 |
| Crocus | 8 – 10 | 2 – 3 |
| Dutch Hyacinth | 10 – 14 | 2 – 3 |
| Dwarf Iris | 10 – 12 | 2 – 3 |
| Grape Hyacinth | 8 – 10 | 2 – 3 |
| Narcissus/Daffodil | 14 – 18 | 4 – 5 |
| Paperwhites | None | 3 – 5 |
| Tulip | 14 – 16 | 4 – 5 |
Post Bloom
After flowering, cut back flower stems and place your containers back in full sun. Continue to water until the foliage dies back naturally. When the foliage is completely spent, place containers in a cool, dry place until early next fall when the bulbs may be safely planted into the garden. Forced bulbs may be planted naturally outdoors after blooming but cannot be forced a second time. Paperwhites will never bloom again and should be discarded after forcing. Previously forced bulbs, after planting in the ground, may skip a year’s bloom but will eventually return to their former beauty and regular schedule.
Need more gardening inspiration? Click here.


