Designing a Japanese Garden

Designing a Japanese garden is an art form that requires careful planning and attention to detail. These gardens aim to create a space for relaxation, contemplation, and beauty. Here are some steps to help you design your own Japanese garden.

  • Choose a style: Japanese gardens come in many styles, including rock, tea garden, pond, and dry landscape. Deciding your preferred style is the first step to creating your unique space.
  • Select plants: Plants are an essential part of a Japanese Garden. Choosing traditional plant species that suit your climate and soil conditions is critical, ensuring they will thrive in your area.
  • Create pathways: Pathways craft an inviting atmosphere as they lead visitors through the garden to various focal points or areas of interest, such as water features or benches. Paths may also be used to divide the garden into distinct sections.
  • Incorporate water: Water is an important element, representing life and serenity. Use a pond or fountain as a focal point and combine it with other water features, such as streams and cascades.
  • Add structures: Traditional Japanese structures like pavilions or gazebos are perfect for creating an atmosphere of calm contemplation in your garden. They can also provide shade and shelter from wind and rain.
  • Add accents: Accents enhance the beauty of a garden. Popular items include stepping stones, lanterns, wind chimes, stone statues, and bird baths.

10 Traditional Japanese Garden Plants

Plants are considered an essential element of a Japanese garden due to their cultural significance. Plants symbolize and evoke the beauty and tranquility characteristic of a traditional Japanese garden design. For centuries, plants have been used to bring out the natural elements while creating harmony and balance within the garden and helping to create a sense of peace and calm.

1. Bamboo: Bamboo is popular in Japanese gardens, as the hollow plants represent resilience and strength. It can be used to create a natural fence or barrier for privacy or artfully arranged to create an interesting sight line within the garden.

2. Pine: The needle-like leaves of pine trees are an iconic part of the traditional Japanese garden, with some species growing up to 120 feet tall. The pine symbolizes longevity and endurance, making it a popular choice for gardens seeking to create a sense of calm.

3. Cherry: When cherry blossoms bloom in the spring, they add beauty and grace to the garden. With delicate pink petals and a sweet fragrance, cherry blossoms represent the ephemeral nature of life.

4. Wisteria: This beautiful flowering vine is often trained to climb trellises or pillars for a dramatic effect in the garden. It’s said to bring luck and fortune to homeowners who cultivate it.

5. Azalea: Azaleas are popular flowering shrubs renowned for their vibrant hues and sweet fragrance. They bring a burst of color to the garden in springtime, when they bloom in a wide array of colors.

6. Maple: The importance of Japanese maples in Japanese garden design cannot be understated. They come in a variety of sizes and colors, and their branches often twist and turn in unique, beautiful shapes that make them a focal point of the garden.

7. Iris: Irises are cherished for their tall, elegant stems and brightly colored petals. These flowers symbolize courage, hope, and faith in Japan, making them a perfect garden addition.

8. Hydrangea: The delicate petals of hydrangeas look like snowflakes, making them a popular choice for adding structure and color to the garden. Hydrangeas represent gratitude in Japan, so they’re often used to say thank you or show appreciation.

9. Bonsai: This traditional art form is often used to add depth and dimension to a Japanese garden. Perfectly manicured miniature trees are specially grown and shaped to create a unique addition to the space.

10. Moss: Soft, lush mosses are often used as groundcover, adding texture and charm to the space. Mosses thrive in shaded areas, perfect for creating a cool and tranquil atmosphere.

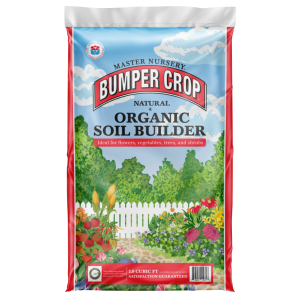
Before beginning any style garden or landscape project, always lay out your design on paper. It will save you a tremendous amount of time, money, and tension. Also, ensure that your garden thrives by planting with the very best soil amender and fertilizer available:

Our soil calculator is a handy and helpful tool if you need to determine how much soil amender you will need.

By combining these principles, plants, and elements, a beautiful and peaceful atmosphere may be achieved, bringing tranquility to your home and garden. By planting with Bumper Crop® products, you ensure the longevity of your plants as you create your own unique version of paradise with a Japanese garden.

Need more gardening inspiration? Click here.


Related Products

Master Nursery® Bumper Crop® Organic Soil Builder
Eastern & Midwestern Regions
Master Nursery® Bumper Crop® Soil Builder
Western Region
Master Nursery® Bumper Crop® Soil Conditioner
Western Region

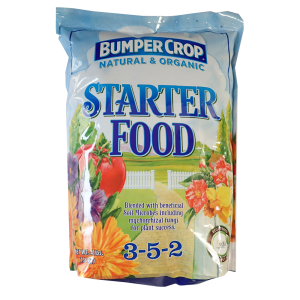
Master Nursery® Bumper Crop® Starter Food
Western Region
Eastern & Midwestern Regions

Planting Ornamental Gourds for Fall Harvest

It’s never too early to plan for fall decorating, and ornamental gourds are a must-have to spread the seasonal vibes. These plants are relatively easy to grow and require minimal maintenance to produce an abundant and vibrant harvest. Whether you’re looking to add something a little different to your home veggie garden or want a convenient and abundant source of autumnal décor items in seasonal colors, ornamental gourds are the way to go!

Types

When choosing suitable varieties of gourds for planting, many options are available. Ornamental gourds can be either large or small and come in various shapes. They are colorful in shades of green, orange, white, yellow, and red. They can be smooth surfaced or lumpy, bumpy, and winged. Smaller selections are generally used for decorating indoors on tabletops and mantles or added to outdoor planters, window boxes, and containers amongst seasonal plants. Larger varieties may be placed outdoors on steps, stoops, porches, and decks. Some, like “dipper, “bottle, and “birdhouse” gourds, are perfect for drying and crafting, turning them into usable and sturdy water dippers, bottles, and birdhouses. Check your local Master Nursery® Garden Center for seed availability.

Planting

Gourd seeds germinate easily and quickly and are best directly seeded into the garden after all danger of frost has passed. They may be planted right into the ground, in a container, or in a raised bed. Amending your in-ground garden soil with Master Nursery® Bumper Crop® Soil Builder [Eastern & Midwestern Regions Western Region] before sowing seed is the best way to ensure that your gourds are off to a healthy start. In the Eastern & Midwestern Regions, you may fill your raised bed with Master Nursery® Bumper Crop® Soil Builder. If you plan to grow your gourd vines in containers, Master Nursery® Bumper Crop® Potting Soil [Eastern & Midwestern Regions Western Region] is your best choice as it is lightweight. If you are unsure how much soil your garden, raised bed, or container requires, our handy soil calculators will help you determine the amount you need.

Planting the seed in small hills or mounds of soil is the traditional way of growing gourds as it contributes to good air circulation, thus reducing disease. Gourds love compost, so build your mounds using plenty of Master Nursery® Bumper Crop® Soil Builder [Eastern & Midwestern Regions Western Region]. You can’t have too much! Sow three seeds to a mound, one to two inches deep, spacing them evenly so the vines will grow and flow down the mound. If growing many vines, mounds should be placed at least five feet apart. There is no need to mound soil when growing in a container, as the container serves as a mound. Because gourds are vines, growing them on an arch or trellis is a great way to utilize garden space.

Care

Once planted, gourd vines need plenty of sunlight and water. Placing them in an area that receives full sun will help ensure maximum growth and yield. Water regularly to keep the soil moist but not soggy. As the vines start producing flowers, it’s important to fertilize them regularly to keep them healthy and productive with more flowers and fruit. Side dress mounds with Master Nursery® Bumper Crop® All Purpose Food once a month throughout the growing season.

Pruning

It’s a good idea to prune the tip of your gourd vines when they reach 10 feet long. This will encourage side branching of the vine, helping it to produce more fruit.

Harvesting

When it comes time for harvest, ornamental gourds should be picked when the vine’s tendrils begin to turn brown. Gourds need 100 to 180 days to ripen. Consult your seed packet for the estimated “Days to Maturity.” When mature, cut your gourds from the vine with pruners or a knife, don’t pull them. To ensure they last as long as possible, gently wash off all dirt from the gourds using a soft cloth. Dry them thoroughly. Store them in a cool, dry place away from direct sunlight or humidity until ready to display. With proper care, these colorful fruits can make for a stunning display during the fall months!

Happy harvesting!

Need more gardening inspiration? Click here.


Related Products

Master Nursery® Bumper Crop® Organic Potting Soil
Eastern & Midwestern Regions
Master Nursery® Bumper Crop® Organic Soil Builder
Eastern & Midwestern Regions
Master Nursery® Bumper Crop® Potting Soil
Western Region

Master Nursery® Bumper Crop® Soil Builder
Western Region
Master Nursery® Bumper Crop® All Purpose Food
Western Region
Eastern & Midwestern Regions

Growing Zucchini and Summer Squash

Zucchini and summer squash are a summer staple in the garden and on the table! These versatile veggies may be enjoyed raw, grilled, fried, sauteed, roasted, and baked. They may be added to both sweet and savory culinary delights. To boot, they are also rich in vitamins and minerals. Grow them yourself, and you can have an endless supply all summer long.

Selecting

We recommend some of our favorite tried and true selections when purchasing seeds.

Summer Squash

Multipik – a straightneck bush plant with a high yield and long harvest time.

Tempest – a crookneck with a rich nutty flavor with a firm texture.

Yellow Crookneck – a buttery flavor and firm texture; pick at 4 – 5 inches long.

Zucchini

Safari – a green zucchini with white stripes, attractive and prolific yielder.

Raven – very dark green, concentrated fruit set, should be succession planted.

Yellowfin – a bright yellow zucchini, very productive.

Planting

Zucchini and summer squash are delightful vegetables to grow as they are easy enough for the beginner vegetable gardener.

The first step is ensuring you have the right environment for them – they need around 6 hours of direct sunlight daily and good soil that’s well-draining. A protected location, sheltered from the wind, is also advisable as it will assist in pollination. There is no need to start your plants indoors as both these veggies germinate easily and quickly and do not like being transplanted. They are best directly seeded into the garden after all danger of frost has passed, and the soil has warmed to at least 60 degrees Fahrenheit.

Plant zucchini and summer squash into the ground, in a container, or in a raised bed. Both are heavy feeders, so amending your in-ground garden soil with Master Nursery® Bumper Crop® Soil Builder [Eastern & Midwestern Regions Western Region] before sowing is the best way to start and keep your plants healthy and happy. If you’re in the Eastern & Midwestern Regions, you may fill your raised bed with Master Nursery® Bumper Crop® Soil Builder. If you plan to grow your zucchini and summer squash in containers, Master Nursery® Bumper Crop® Potting Soil [Eastern & Midwestern Regions Western Region] is your best choice as it is lightweight. If you are unsure how much soil you need, our handy soil calculators will help you determine the optimal amount.

Sow three seeds about 1 inch deep and 3 inches apart when planting. In the ground and in raised beds, rows should be 3 feet apart. Black plastic mulch will help warm garden soil more quickly. Raised beds and containers will warm up quickly on their own and do not require this step. A soil thermometer is a helpful tool in determining soil warmth.

Planting Tip:

Zucchini and summer squash lend themselves to succession planting. Sow seeds every two to three weeks, ceasing in mid-summer, and you will have a continuous supply of these delicious veggies up until frost. Succession planting will also improve pollination, helping the squash plants to produce more abundantly and have bigger and tastier fruit.

Care

Zucchini and summer squash are easy-care vegetable plants.

  • Water thoroughly after planting and keep the soil moist but not soggy throughout their growing season.
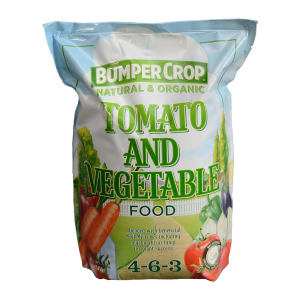
  • Once the plants are established, you’ll need to feed them regularly. Fertilize every two weeks with Master Nursery® Bumper Crop® Tomato and Vegetable Food.
  • Keep weeds in check and mulch around the plants to retain moisture, discourage weeds, and prevent soilborne diseases. Salt hay or straw are recommended if black plastic mulch is not used.

Harvest

Harvest zucchini and summer squash when fruits reach their mature size; typically, this is between 4-8 inches long, although some varieties can grow to 12 inches or more! Cut fruits off their stems with sharp scissors or a knife – never pull on them, as this can damage the plant. Check your plants daily for ripe fruits since they can quickly become oversized if left on the vine for too long.

Growing zucchini and summer squash is an easy garden chore that yields delicious fruits to enjoy all season long.

Need more gardening inspiration? Click here.


Related Products

Master Nursery® Bumper Crop® Organic Soil Builder
Eastern & Midwestern Regions
Master Nursery® Bumper Crop® Organic Potting Soil
Eastern & Midwestern Regions
Master Nursery® Bumper Crop® Potting Soil
Western Region

Master Nursery® Bumper Crop® Soil Builder
Western Region
Master Nursery® Bumper Crop® Tomato and Vegetable Food
Western Region
Eastern & Midwestern Regions

Bringing Butterflies to the Backyard

In spring, female butterflies will be primarily concerned with finding their species’ specific host plants on which to lay fertilized eggs. Instinctively, they know they must locate plants to ensure their caterpillars have appropriate food for survival after hatching. Both male and female butterflies will be looking for flowers with nectar for their own survival. And they will be searching for shelter from rainy or windy weather, a sunny place for basking, and a water source. Because many natural butterfly habitats in North America are disappearing at an alarming rate, it is becoming increasingly difficult for butterflies to find these necessities of life.

Following these pointers, starting a butterfly garden can be simple and rewarding. The most important thing you can do as a gardener is plant both nectar and host plants. Providing host plants for caterpillars to feed on will allow you to watch the metamorphosis from caterpillar to chrysalis to butterfly. So, do not discourage caterpillars. They may make your garden plants look bad, but it’s usually only temporary. Most important – do not use pesticides! You may be killing off the very insects you made the garden for. And you don’t have to have a large area to get a response. Just a few select plants will spur some action. Choose the sunniest spot possible for your butterfly garden. It could be any size or shape; even a short border will work. Combining woody shrubs, perennials, and annual flowers works best, but using just a few plants can still yield results. Planting a section of wildflowers is an easy way to cover a problem area and lure some butterflies to your yard. If you don’t have room for a garden, fuchsia, petunia, or impatiens hanging baskets will attract butterflies and hummingbirds.

The following is a list of plants that attract butterflies:

Woody shrubs:

  • Butterfly Bush (Buddleja)
  • Deutzia (Deutzia)
  • Glossy Abelia (Abelia)
  • Japanese Privet (Ligustrum)
  • Lilac (Syringa)
  • Spirea (Spiraea)
  • Weigela (Weigela)

Vines:

  • Honeysuckle (Lonicera)
  • Trumpet vine (Campsis)

Perennials:

  • Aster (Aster)
  • Butterfly Weed (Asclepias)
  • Carnation (Dianthus)
  • Coneflower (Echinacea)
  • False Sunflower (Heliopsis)
  • Joe-Pye weed (Eutrochium)
  • Shasta Daisy (Leucanthemum)
  • Yarrow (Achillea)

Annuals & Perennials:

  • Alyssum (Lobularia)
  • Balsam (Impatiens)
  • Cosmos (Cosmos)
  • Dahlia (Dahlia)
  • Fuchsia (Fuchsia)
  • Geranium (Pelargonium)
  • Heliotrope (Heliotropium)
  • Lantana (Lantana)
  • Marigold (Tagetes)
  • Petunia (Petunia)
  • Portulaca (Portulaca)
  • Salvia (Salvia)
  • Snapdragon (Antirrhinum)
  • Vinca (Catharanthus)
  • Zinnia (Zinnia)

Tips:

  • Plant all your pollinator plants using Master Nursery® Bumper Crop® Soil Builder [Eastern & Midwestern Regions Western Region]. This premium soil amender, blended explicitly for your growing region, will ensure your pollinator plants’ health, vigor, productivity, and longevity.
  • To ensure the health and safety of your backyard butterflies and their caterpillars, fertilize your pollinator garden with Master Nursery® Bumper Crop® Rose and Flower Food. This organic plant food is a blend of natural ingredients designed to encourage sturdy growth and an explosion of blooms.

Remember, any garden, large or small, even a single container, can become a butterfly habitat with just a little planning.

Need more gardening inspiration? Click here.

Related Products

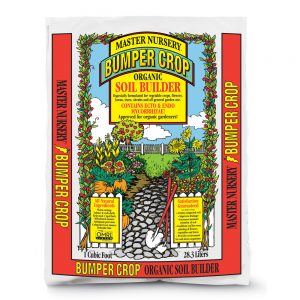
Master Nursery® Bumper Crop® Organic Soil Builder
Eastern & Midwestern Regions
Master Nursery® Bumper Crop® Soil Builder
Western Region
Master Nursery® Bumper Crop® Rose and Flower Food
Western Region
Eastern & Midwestern Regions