Spring Container Planting

This is the moment we’ve all been waiting for… Spring container planting! All through the long winter months, we eagerly await signs of Spring; however, the wait is now over! Garden centers are packed with their favorite cold-tolerant annuals… perfect for your Spring container garden!  Not only can containers bring an early burst of Spring to your front entryway, deck, patio, or porch, but you can get creative and expressive with stunning flower choices for every container.

Why Containers? Why Now?

Planting in containers like pots, urns, barrels, and window boxes can extend the growing season and help you refresh your gardening skills before the big rush of Spring garden chores. Containers are also less dependent on weather conditions and can easily be moved to warmer and sunnier spots even on chilly days. Spring containers can even be brought indoors to a porch, sunroom, or garage if a hard frost threatens, and your early Spring gardening doesn’t need to be in danger. Containers are easy to care for and can brighten up any part of your yard, even before Mother Nature gets growing again.

Favorite Cold Tolerant Spring Annuals

With limited space in containers, you’ll want to choose the very best Spring flowers for brilliant color and thriving growth. Spring can be a temperamental season and may still have fluctuating temperatures and uneven moisture, so it is smart to choose flowers that can tolerate these conditions.

  • Alyssum
  • Bachelor’s Button
  • Calendula
  • Calibrachoa
  • Dianthus
  • Diascia
  • English Daisy
  • Lobelia
  • Nemesia
  • Osteospermum
  • Pansy
  • Petunia
  • Primrose
  • Snapdragon
  • Stock
  • Sweet Pea

Tips for Spring Containers

No matter what flowering annuals you choose for Spring container planting, they need the best care to thrive through this often-temperamental season.

Be sure to select a premium quality potting soil for your containers! We recommend Master Nursery® Bumper Crop® Potting Soil [Eastern & Midwestern Regions | Western Region]. This product is an exclusive blend of high quality natural and organic ingredients that are perfectly balanced for pH, water holding capabilities, and drainage. Choosing and using Master Nursery® Bumper Crop® Potting Soil will save you time and money, reducing both your water and fertilizer needs.

Fertilize your container at planting time to promote the best growth and vibrant blooms. We highly recommend Master Nursery® Bumper Crop® Rose and Flower Food. This natural and organic plant food boasts an NPK of 4 – 6 – 2 to promote healthy plants and lots of flowers! It is blended with beneficial soil microbes, including mycorrhizal fungi to promote long, strong roots.

Take care not to overwater containers; balance your watering regimen with Mother Nature’s Spring rains. Pots should have good drainage to be sure excess water can easily flow away from the root zone. Placing pots on casters or stands can also help improve drainage and be sure the pots are not sitting in Spring puddles.

To help your Spring containers last as long as possible, deadhead the flowers regularly with sharp, thin pruning snips. This will keep the pots tidy and encourage reblooming for a longer flowering season, letting you enjoy every Spring bloom well into the season.

Need more gardening inspiration? Click here.


Related Products

Master Nursery® Bumper Crop® Organic Potting Soil
Eastern & Midwestern Regions
Master Nursery® Bumper Crop® Potting Soil
Western Region
Master Nursery® Bumper Crop® Rose and Flower Food
Western Region
Eastern & Midwestern Regions

Cultivating Carrots

Spring. It’s the time of year we conjure humorous images of the mischievous Peter Rabbit wreaking havoc in Mr. McGregor’s vegetable garden. Like the Beatrix Potter story, carrots are ideal for children and adults alike. They are fun and easy to grow for all ages and provide many health benefits.

Carrots consumption:

  • Improves vision
  • Boosts brain health
  • Acts as an anti-inflammatory
  • Supports immunity
  • Reduces the risk of heart disease
  • Regulates blood pressure
  • Balances blood sugar

Eaten raw, boiled, steamed, or roasted, carrots have a delicate sweet flavor that may be enjoyed by even the pickiest of people and bunnies.

Fun Fact: Carrots are more nutritious when eaten cooked rather than raw. Cooking them until just tender increases available carotenoids, an antioxidant that enhances the immune system and protects from disease.

Carrot Crops

Carrots come in a variety of:

  • Colors: white, yellow, orange, red, and purple
  • Shapes: round, blunt, pointed
  • Sizes: baby, small, medium, and long as well as thick and thin

As far as we know, neither Peter nor Mr. McGregor preferred a particular carrot, but we know of a few varieties that are worth recommending.

Adelaide

Orange
Baby Carrot, 3” long
50 days to maturity
Early season, fit more in a small space

Atlas

Orange
Round, 1 ½ to 2” diameter
70 days to maturity
Distinctive shape

Bolero

Orange
Thick, 7 – 8” long
75 days to maturity
Late season, great storage quality

Rainbow Mix

White, yellow, purple, and red mix
Thin, 7 – 9” long
67 days to maturity
Attractive colors, unique taste

Romance

Deep orange
Blunt, 6 – 7” long
70 days to maturity
Consistently good flavor

Carrot Cultivation

The single most important factor in carrot growing success is the soil! Carrots require very loose, fertile, well-drained soil with good moisture-holding capacity for long, smooth root development. Most gardens and gardeners are not fortunate enough to have the perfect soil for growing carrots; that’s where Master Nursery® comes in. Our convenient, bagged, premium soils and soil amenders are perfect for taking your native soil to the next level. To find a retailer near you, see our Bumper Crop® store locator.

To prepare your garden when planting carrots:

  • In-ground Beds
    Till native soil to at least 1 foot deep, removing all rocks and debris, and evenly spread at least 4 inches of Master Nursery® Bumper Crop® Soil Builder [Eastern & Midwestern Regions | Western Region] atop the soil surface and till again; this is best done in the fall.
  • Raised Beds [Eastern & Midwestern Regions Only]
    Fill your raised beds with Master Nursery® Bumper Crop® Soil Builder; no other soil is needed.
  • All Containers
    Fill grow bags and tubs with Master Nursery® Bumper Crop® Potting Soil [Eastern & Midwestern Regions | Western Region]. Make sure that tubs have adequate drainage holes to prevent rot.

Not sure how much soil you will need? Our handy Soil Calculator makes it easy to avoid over or under-estimating the amount required for your particular garden size.

When amending the soil in garden beds and filling containers and raised beds, incorporate Master Nursery® Bumper Crop® Tomato and Vegetable Food; this will get your carrots off to a healthy start.

Carrot Care

Carrots are direct sown beginning in the early spring, as soon as the soil is workable, through mid-summer. Carrots may be grown in the ground, but for optimum results, especially if the native soil is heavy, plant them in raised beds or containers.

Easy to sow, seeds should be set 1 inch apart and ¼ to ½ inch deep in rows 12 – 18 inches apart. Keep the soil continually moist while the seeds germinate. Once the green leaves begin to form, thin the seedlings to approximately 2 inches apart, depending on the variety and shape of the selected carrot. It is important to keep the rows weed-free to avoid root competition.

Keep carrot roots consistently moist but not wet through their growing period. Mulching the rows will help retain soil moisture and discourage weeds from taking over. Carrots should be side dressed with Master Nursery® Bumper Crop® Tomato and Vegetable Food one month after thinning and again one month after that. Carrots may be eaten at any stage. Harvest them when they reach their preferred size. Do not allow them to exceed their recommended size, or they will become woody, and the taste will decline.

Carrot Tip:  To avoid an overabundance and to support a continuous supply of tasty carrots, plant just enough seed to meet your needs every three weeks throughout the season. Stop planting carrots approximately 100 days before the expected first frost date. This planting should be a variety selected for storage and, after harvest, should be kept in a cool environment, about 32 degrees Fahrenheit, with high humidity. Don’t forget to plant a few extra carrots for Peter and his friends.

Need more gardening inspiration? Click here.


Related Products

Master Nursery® Bumper Crop® Organic Potting Soil
Eastern & Midwestern Regions
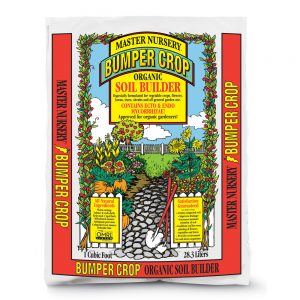
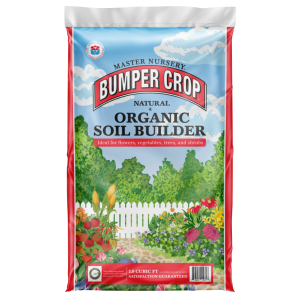
Master Nursery® Bumper Crop® Organic Soil Builder
Eastern & Midwestern Regions
Master Nursery® Bumper Crop® Potting Soil
Western Region

Master Nursery® Bumper Crop® Soil Builder
Western Region
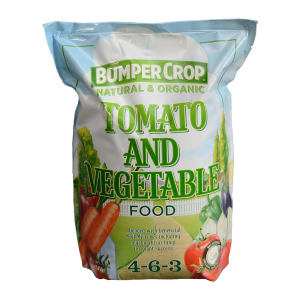
Master Nursery® Bumper Crop® Tomato and Vegetable Food
Western Region
Eastern & Midwestern Regions

Growing Onions from Sets

Onions are arguably the most widely used vegetable worldwide, with over 20 billion pounds grown yearly. More often than not, onions are used to flavor food rather than eaten alone. They are the perfect addition to all sorts of savory dishes in just about every culture. In recipes, the bulbs may be used whole, sliced, diced, chopped, minced, grated, and even powdered. They are consumed raw, fried, sauteed, grilled, broiled, boiled, and roasted. Not only are they delicious, but there are also health benefits to eating onions. They possess potent anti-inflammatory properties, are high in vitamin C and B6, and are a great source of potassium. Although the bulb is most commonly consumed, all parts of the onion plant are edible, including green leaves and flowers.

Why Grow Your Own

Onions are easily affordable and readily available at the local grocery, so why grow your own? Well, for one, they taste better, much better! Convenience is another reason; you can have onions easily accessible at various stages throughout the growing season and beyond. Onions are also great companion plants. They are frequently planted alongside or interspersed with members of the cabbage family, beets, carrots, cucumbers, eggplants, lettuces, peppers, potatoes, squashes, tomatoes, and zucchinis to repel a number of garden pests.

Selection

Onions are available in an almost unlimited number of varieties. There are white, yellow, and red onions. They may have a pungent flavor, a sweet taste, or anywhere in between. There are small, medium, and large onion sizes. Scallions, green onions, or bunching onions are harvested and eaten when still immature before the bulb has formed. There are short-day (southern gardens), long-day (northern gardens), and day-neutral (mid-section America gardens) onion varieties. Your local garden center will advise which are best for your area. Personal preference and anticipated usage will help narrow your selection further.

Onions may be grown from either seed or sets. It takes a great deal of time to grow onions from seed; therefore, they should be started indoors early. Onion sets, highlighted in this article, are a quick and easy way to start onions, recommended for both the beginner and experienced veggie gardener. Sets consist of tiny onions that are to be planted directly into the soil and mature in about 14 weeks. When purchasing your sets, it is important to keep in mind that bigger is not better. The maximum size of the bulbs should be no greater than ¾ of an inch. Larger size bulbs tend to have several associated problems that can lead to grower disappointment.

Preparing

Onions must be planted in a full-sun location. In the north, onion sets should be planted in the spring as soon as the soil is workable and not too wet. In the south, they may be planted in the early fall. Onion sets may be planted directly in the garden, raised beds, or containers, but they must have loose, fertile, well-drained soil.

Poor soil? No problem! Master Nursery® has you covered with convenient, bagged, premium soils, and soil amenders! To find a retailer near you, use our Bumper Crop® store locator.

To prepare your garden when planting onions:

Not sure how much soil you’ll need? Our handy Soil Calculator makes it easy to avoid over or under-estimating the amount required for your particular garden size.

Onions are heavy feeders. When amending the soil in garden beds and filling containers and raised beds, incorporate Master Nursery® Bumper Crop® Tomato and Vegetable Food; this will get onions, and all of your garden veggies, off to a good start.

Planting

When planting onion sets directly into the ground and in raised beds, create furrows (a trench or gully) about 2 inches deep and 3 inches wide. Rows should be no closer than one foot apart. Place about an inch of Master Nursery® Bumper Crop® Soil Builder [Eastern & Midwestern Regions Western Region] in the bottom of the furrow. Gently place the small onions 6 inches apart, pointed side up, and press lightly into the compost at the bottom of the furrow. Backfill with remaining soil. Simply a smaller growing space, this same planting process should be followed when growing onions in containers.

Growing

Onions grow best with about an inch of water a week. If there is a shortage of rain, supplemental water must be provided. Mulching between the rows will help the soil retain moisture and aid in keeping weeds at bay. Fertilize onions monthly by side-dressing with Master Nursery® Bumper Crop® Tomato and Vegetable Food.

Harvesting, Curing, & Storing

Harvest onions as needed; they may be eaten at any stage. For winter storage, harvest time is here when the onion leaves turn yellow and fall over. You should see the top of the bulb crowning the soil, signifying that the bulb is mature. All onions should be taken up before the first frost. Either pull the plants by hand or use a garden fork to dig them out of the ground.

To cure onions for storage, lay them out in a single layer in a warm, dry, well-ventilated location until the necks are completely dry and the stem contains no more moisture. At this time, with a clean, sharp pair of scissors, cut the leaves and roots off of the bulb and gently place them in a bushel basket or mesh bag.

Onions are best stored in a cool, dark location like a root cellar, basement, or garage that will not freeze. The air temperature should be maintained around 35 to 40 degrees Fahrenheit. Some onions store better than others. The best will maintain their quality for up to 12 months.

Tip

If, by chance, an onion begins to bolt and throws up a flower stalk, immediately cut off the stalk and use the onion as soon as possible. Flowering changes the taste of the onion, making it unpleasant, and an onion that has bolted will not last in storage.

Need more gardening inspiration? Click here.


Related Products

Master Nursery® Bumper Crop® Organic Potting Soil
Eastern & Midwestern Regions
Master Nursery® Bumper Crop® Organic Soil Builder
Eastern & Midwestern Regions
Master Nursery® Bumper Crop® Potting Soil
Western Region

Master Nursery® Bumper Crop® Soil Builder
Western Region
Master Nursery® Bumper Crop® Tomato and Vegetable Food
Western Region
Eastern & Midwestern Regions

Growing Spring Garlic

Like garlic? Who doesn’t? Most often thought of and used as an herb or spice, did you know garlic is actually a vegetable? Garlic is a member of the onion family. Although consumed in smaller quantities, all parts of the garlic plant are edible, particularly the bulb, just like an onion, making it botanically classified as a vegetable.

Garlic has been used to season food in many parts of the world for thousands of years and has unlimited uses. Its health benefits are also numerous. The consumption of garlic:

  • increases immune function
  • reduces cholesterol
  • lowers blood pressure
  • decreases bacteria
  • lessens inflammation
  • diminishes bone loss

For both the culinary and health benefits, wouldn’t it be wonderful to have garlic on hand whenever you desire? You can if you grow your own!

Garlic Selection

Garlic is most often grown in the fall for a very important reason; fall planting produces larger bulbs. Planting at this time provides the cold treatment necessary for bulb development while also allowing plenty of time for the plant to set roots before winter. That being said, spring is the next best time of the year to plant garlic. Still, you must replicate that cooling period by placing garlic bulbs in a paper bag in the refrigerator for vernalization prior to planting.

Note: spring-planted garlic will produce smaller bulbs than garlic planted in the fall and is harvested later in the season. Try planting both fall- and spring-planted garlic to extend your season and to provide early spring green garlic (softneck) and garlic scapes (hardneck) for spring harvesting.

Choose organic or locally grown garlic and not grocery-store garlic. Unlike bulbs purchased for eating, organic cloves sold for growing will not have been sprayed with a growth inhibitor used to prevent garlic from sprouting in storage. When buying garlic from your local garden center, select large, firm cloves without any signs of damage, softening, or bruising to provide the healthiest crop.

There are numerous varieties of tasty garlic to grow, but only two specific types.

Hardneck Garlic

  • Cold tolerant for Northern gardens
  • Produces a central stem called a “scape” that is edible
  • Fewer but larger cloves than softneck (average 5)
  • Requires 10 – 12 weeks of cold treatment

Softneck

  • Less cold tolerant, used in Southern gardens
  • No central stem: leaves may be harvested and eaten in the spring
  • More but smaller cloves than hardneck (average 7)
  • Required 3 – 4 weeks of cold treatment

Garlic Growing

It’s easy to grow garlic! It is resistant to both deer and rabbits and, when planted with other vegetables, makes a great companion plant. Do not, however, plant garlic alongside peas or beans, as it will stunt their growth.

To grow the best-tasting and biggest garlic bulbs, plant cloves in a full-sun location in rich, well-drained soil. The better the soil, the better the garlic. If your soil is not optimal, Master Nursery® can help. We offer conveniently bagged, premium soils, and soil amenders to prepare your garden and containers for planting. To find a retailer near you, use our Bumper Crop® store locator.

To achieve the best results when planting garlic:

  • In-ground Beds
    Till native soil to at least 10 inches deep, removing all rocks and debris, and evenly spread at least 3 inches of Master Nursery® Bumper Crop® Soil Builder [Eastern & Midwestern Regions | Western Region] atop the soil surface and till again; this is best done in the fall.
  • Raised Beds [Eastern & Midwestern Regions Only]
    Fill your raised beds with Master Nursery® Bumper Crop® Soil Builder; no other soil is needed.
  • All Containers
    Fill containers with Master Nursery® Bumper Crop® Potting Soil [Eastern & Midwestern Regions | Western Region]. Make sure that containers have adequate drainage holes to prevent rot.

Not sure how much soil you’ll need? Our handy Soil Calculator makes it easy to avoid over or under-estimating the amount required for your particular garden size.

Garlic does best in nutritious soil. When amending the soil in garden beds in the fall and filling containers and raised beds, incorporate Master Nursery® Bumper Crop® Tomato and Vegetable Food; this will get your garlic and all garden veggies off to a good start.

For spring-planted garlic in the ground, raised bed, or in containers:

  • Plant in the spring as early as possible.
  • Leave the papery skin in tack when planting.
  • Space cloves at inches on center in the planting bed or container.
  • Press cloves into the amended soil, inches deep, pointed side up.
  • Cover with inches of soil.
  • Side dress with Master Nursery® Bumper Crop® Tomato and Vegetable Food at planting time and once again one month later.
  • Water garlic well after planting and fertilizing. The soil should be uniformly moist but not soggy, or the bulbs will rot.
  • Adding a layer of mulch will help keep the soil moist, soil temperatures even, and reduce weeds.

Garlic Harvesting, Curing, & Storing

Harvesting
Spring-planted garlic will be ready to harvest in late summer when the lower leaves turn brown, and all others begin to yellow. Before harvesting, allow the soil to dry out a bit. Harvest garlic by gently loosening the soil around each bulb and lifting. Brush off all excess soil before curing.

Curing
Curing should be done out of direct sunlight in a shady spot with adequate air circulation. Spread harvested bulbs, single layer, not touching, on a drying screen for 2 to 3 weeks. Once fully cured, remove the leaves and roots with clean, sharp scissors.

Storing
Store garlic in a dry location with good ventilation at 45 – 50 degrees Fahrenheit and about 50% humidity.

Need more gardening inspiration? Click here.


Related Products

Master Nursery® Bumper Crop® Organic Potting Soil
Eastern & Midwestern Regions
Master Nursery® Bumper Crop® Organic Soil Builder
Eastern & Midwestern Regions
Master Nursery® Bumper Crop® Potting Soil
Western Region

Master Nursery® Bumper Crop® Soil Builder
Western Region
Master Nursery® Bumper Crop® Tomato and Vegetable Food
Western Region
Eastern & Midwestern Regions

Growing Potatoes

We never met a potato that we didn’t like! This delicious and versatile vegetable, available in a variety of colors, shapes, and sizes, can be eaten baked, boiled, mashed, and fried. It can be served as a side dish or used in soups, salads, and stews. And did you know that potatoes are even tastier when homegrown?

Benefits

Starchy vegetables, like potatoes, have gotten a bad reputation as of late. Starch is a carbohydrate that our bodies turn into glucose to use or store for energy. We’re told that potatoes “pack on the pounds”; however, we don’t often hear about their nutritional and health benefits. Depending on the type, potatoes are rich in antioxidants, fiber, vitamins like C and B6, and essential minerals like potassium, magnesium, and phosphorus.

Ready

Potatoes are a tuber. A tuber is an underground stem. Your local Master Nursery Garden Center is the best place to purchase starter potato tubers. These are called “seed” potatoes. Seed potatoes are available in a number of varieties, are disease-resistant, and have eyes (buds) from which the above-ground or vegetative part of the plant grows.

Popular potato varieties include:

  • Adirondack Blue
    Color & Shape: Dark purple skin with purple flesh, oblong
    Facts: Good yield, gourmet
    Use: Great mashed and in salad
  • Katahdin
    Color & Shape: Buff skin with white flesh, round to oblong
    Facts: Heirloom, good yield, drought-resistant
    Use: Perfect for soups and stews
  • Kennebec
    Color & Shape: Thin, smooth skin with creamy flesh, round to oblong
    Facts: High yield, mid-season, stores well
    Use: Harvest new and mature. Frying, baking, & boiling
  • Red Pontiac
    Color & Shape: Thin red skin with white flesh, round to oblong
    Facts: Grows well in clay soil, stores well
    Use: Harvest new and mature. Excellent for mashing
  • Rose Finn Apple Fingerling
    Color & Shape: Thin rose-blush skin with pale yellow flesh, small, slender, finger-shaped
    Facts: Heirloom, stores well
    Uses: Roasting, salads, soups, & stews
  • Yukon Gold
    Color & Shape: Thin gold skin with yellow flesh with a buttery flavor, slightly flat and oval
    Facts: Early potato, high yield, stores well
    Use: Harvest new and mature. Boiling, baking, frying, mashing & salads

One to two days before planting, with a sharp, clean knife, cut the seed potatoes into 1 ½ to 2-inch pieces, each containing at least one eye. To prevent rot, allow the cuts to air dry and callus over before planting. If the seed potatoes are smaller than two inches, you may plant them whole as long as they have at least one eye.

Set

Potatoes should be planted in the spring when the soil temperature is at least 45 degrees Fahrenheit and require a full sun site. Potatoes may be grown directly in the ground, in raised beds, grow bags, and tubs, but they must have loose, fertile, well-drained soil.

Don’t have optimum soil? This is where Master Nursery® comes to the rescue with convenient, bagged, premium soils, and soil amenders! To find a retailer near you, use our Bumper Crop® store locator.

To prepare your garden when planting potatoes:

Not sure how much soil you’ll need? Our handy Soil Calculator makes it easy to avoid over or under-estimating the amount required for your particular garden size.

When amending the soil in garden beds and filling containers and raised beds, incorporate Master Nursery® Bumper Crop® Tomato and Vegetable Food; this will get potatoes, and all of your garden veggies, off to a good start.

Go

Now it’s time to plant. In both in-ground and raised beds, create furrows (a trench or gully) about 8 inches deep. The furrows should be at least three feet apart to give potatoes plenty of room to grow. Place the potato pieces one foot apart in the furrows with the eyes facing upward. Cover the potato pieces with 4 inches of the soil excavated to create the furrows. As the potato plants grow, you may continue to fill up the furrow and even mound the soil around the plant to develop a deep, soft place for potatoes to mature. This same process should be used in grow bags and tubs. It is simply a smaller growing space.

Basic Care

  • Potatoes prefer a soil pH of 6.0 – 6.5 but will grow in soil pH as low as 5.5. Test your soil before planting and amend accordingly.
  • Potato plants require 1 – 2 inches of water per week. If Mother Nature does not provide moisture, then we must.
  • After planting, continue to fertilize potatoes monthly with Master Nursery® Bumper Crop® Tomato and Vegetable Food; to keep plants healthy and increase yield.

Harvest Time

  • New
    New potatoes are ready to harvest in approximately 60 to 90 days from planting; harvest time depends on the variety and weather conditions. It should be safe to harvest new potatoes 2 to 3 weeks after the plant stops flowering.
  • Mature
    Fully mature potatoes are ready to harvest approximately 120 days from planting; harvest time depends on the variety and weather conditions. It should be safe to harvest mature potatoes 2 to 3 weeks after the plant foliage has died back but before the first fall frost.

Reaching into the soil and harvesting a potato or two is perfectly fine to ensure they are ready. Mature potatoes should have thick and well-attached skins. If the skins are too thin, they will be easily rubbed off and should be left in the ground for a more extended period of time.

It is best to dig your potato crop with a garden fork. Begin carefully digging a foot and a half out from the center of the plant to avoid spearing or damaging the vegetable. Damaged potatoes do not store well.

Storage

Cure potatoes for about two weeks at 45 to 60 degrees Fahrenheit; spread out in a single layer in an area with high humidity. This allows the skin time to harden. Once cured, sort through the potatoes and dispose of any soft, bruised, or damaged tubers. Store potatoes in a cool, dark environment at around 40 degrees Fahrenheit. If the temperature rises above 45 degrees, the tubers will become useless as they sprout and shrivel. The best place to store potatoes is a root cellar, cool basement, garage, or spare refrigerator. Never let potatoes freeze! Most mature potatoes will remain in good condition with proper storage for seven to eight months.

Need more gardening inspiration? Click here.


Related Products

Master Nursery® Bumper Crop® Organic Potting Soil
Eastern & Midwestern Regions
Master Nursery® Bumper Crop® Organic Soil Builder
Eastern & Midwestern Regions
Master Nursery® Bumper Crop® Potting Soil
Western Region

Master Nursery® Bumper Crop® Soil Builder
Western Region
Master Nursery® Bumper Crop® Tomato and Vegetable Food
Western Region
Eastern & Midwestern Regions