Building a Simple Raised Bed

Why Raised Beds
Any plant grown in an in-ground garden may be cultivated in a raised bed; this includes flowers, fruits, vegetables, and herbs. Raised bed gardening offers several advantages over growing in the ground; these include:

  • Improved soil conditions
  • Earlier planting
  • Easier maintenance
  • Decreased garden pests
  • Higher crop yield

Building a Simple Raised Bed

Raised beds are available in various styles, materials, and sizes. They may be purchased complete or in DIY kits. If you are adventuresome and thrifty, building your own raised garden bed from scratch is the way to go.
A home-built raised bed can be made to any size you choose; however, it is best to build the bed no wider than 4 feet. Optimal for ease of planting and maintaining, a raised garden of 4 feet wide will ensure you will never have to stretch further than 2 feet into the bed, a comfortable reach for most.

Materials for a Simple DIY 4’ x 8’ Raised Bed

A 4’ x 8’ raised garden bed is a perfect size. It will provide plenty of room to grow various vegetables, including peppers, tomatoes, lettuce, carrots, radishes, cucumbers, and more. Whereas lettuce only requires a 6-inch soil depth to accommodate its root system, tomatoes, kale, cucumbers, squash, and zucchini need about 16 inches. We recommend building your bed at least 18 inches deep to accommodate plants with a heftier root system.

Note: All wood is not equal. For your bed’s longevity, we recommend using either cedar or white oak. We do not recommend using pressure-treated lumber for a raised bed in which edibles will be grown.

Materials

  • 6 pieces of 2” x 10” x 8’ Boards
  • 4 pieces of 2” x 2” x 24’ Wooden Stakes
  • Deck Screws
  • Table Saw
  • Electric Drill
  • Electric Screwdriver

Let’s Prepare

  • Gather your supplies and tools, borrowing tools if necessary.
  • Select a full sun site with level ground convenient to a water source.
  • If the selected site is lawn, mow it short and cover it with landscape fabric or a thick layer of cardboard or newspaper to help suppress weeds.
  • To save time and energy, work directly in the area where the raised bed will be situated.

Let’s Build

  • Cut 2 of the boards in half, creating four 4’ pieces. Leave the remaining four boards uncut at 8’.
  • Form a rectangular frame with 2 of the 4’ boards and 2 of the 8’ boards.
  • Pre-drill screw holes that will be used to secure the corners – 4 per corner.
  • Fasten the boards together with the deck screws.
  • Repeat with the remaining boards.
  • Lay one frame over the selected site.
  • Mark the 2” x 2” x 24” stakes with a line 8 inches from the pointed tip of the stake.
  • On the inside of one of the corners of the frame, pound a 2” x 2” stake into the ground up to the 8” line. This will leave 16 inches above the ground.
  • Insert a stake directly inside the frame at the remaining three corners of the bed and pound them into the ground at the 8” line.
  • With the deck screws and drill, secure the frame to the stakes.

Preparing the Raised Bed

Fill

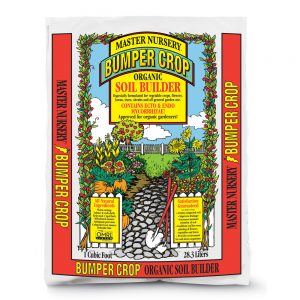
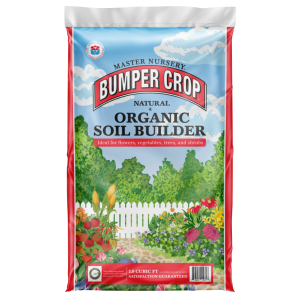
Now is the perfect time to build a raised bed and fill it with Master Nursery® Bumper Crop® Soil Builder [Eastern & Midwestern Regions]. Our handy calculator will assist you in recommending the amount of soil your specific bed size requires.

Feed

Organic fertilizers are naturally slow release. Fertilize your raised bed at soil filling time, and it will be perfect for planting. Visit our website to review our variety of organic fertilizer offerings designed to meet your crop’s specific needs.

Protect

Soil should never be left exposed to the elements. Be sure to cover your prepared raised bed soil during the winter. Place a thick layer of salt marsh hay, straw, or leaves atop your soil and leave it in place until you’re ready to plant in the spring.

Late fall and early winter are the perfect times to build and fill a raised bed. Addressing this late-season chore will keep you gardening in the colder months, assuring that your muscles remain active and will leave you with a lighter workload when spring arrives.

Need more gardening inspiration? Click here.


Related Products

Master Nursery® Bumper Crop® Organic Soil Builder
Eastern & Midwestern Regions

The Indoor Succulent Garden

Succulents make charming, easy-care additions to your houseplant collection. This popular plant group will add a unique assortment of fleshy, fantastically colored foliage to your home to be enjoyed year-round.

What Are Succulents?

If you are familiar with aloe, agave, jade, or snake plants, you already know some of the most popular succulents. What distinguishes these houseplants from others is their thick, fleshy leaves that store moisture. This allows them to remain healthy with very little water. Succulents are generally slow growers that thrive with neglect. This makes them the ideal houseplant for those with a busy schedule and novice plant parents.

Choosing Succulents

There are so very many captivating succulents offered at your local Master Nursery® Garden Center in a wide range of colors, shapes, and sizes. Large growing succulents and those with rubbery leaves, like the ZZ plant and snake plant, are perfect for growing as a single potted specimen. When choosing a group of succulents to plant together in a container, select various colors, textures, and shapes that appeal to you. Most succulents have similar cultural requirements, making them perfect container mates.

When designing a succulent container garden, the same basic container garden principles apply. You will need a thriller (upright plant), filler (plants to fill in the void), and a spiller (a plant that hangs over the side) to obtain the most pleasing appearance.

Caring for Succulents

Succulents are relatively easy-care plants, but they do have specific needs.

POTS
A pot for succulents must have excellent drainage with one or more drainage holes, as these plants do not like wet feet. Unfinished terra cotta pots make the perfect succulent planter as they are porous, keeping the soil from remaining too moist. Shallow or otherwise small pots are fine for succulents, as these slow growers don’t mind being a bit cramped.

SOIL
Fast-draining soil is a must for succulents. We recommend using Master Nursery® Bumper Crop® Potting Soil [Eastern & Midwestern Regions | Western Region] with the addition of coarse sand or perlite to sharpen the soil drainage further. This will allow the soil to dry out more quickly, making it suitable for succulent success.

FERTILIZER
Indoor succulents require only a mild feeding once a year as growth resumes in the spring. The longer days and increased sunlight will stimulate new growth. It is best to select a fertilizer labeled for succulents and cacti.

SUNLIGHT
Succulents will maintain their compact stature and show off their best color if they receive at least 6 hours of sunlight daily. South or west-facing windows are the best options. Rotating pots once a week is a good idea to ensure straight, even growth. For larger succulent containers, use wheeled stands or coasters so they can be rotated easily.

TEMPERATURE
Indoor succulents do well in typical household temperatures but prefer slightly lower temperatures when their growth slows in winter. At that time, consider moving them to a cooler room.

WATER
While succulents thrive in arid climates, they need proper watering to stay plump and fresh. Allow the soil to dry out between watering. When you do water succulents, water them thoroughly. Do not let the plants stand in water; empty saucers immediately. For larger potted succulents, pot feet, to lift the plants above the saucer, will assist in drainage. Avoid pouring water directly on the fleshy leaves. Instead, water the soil using an indoor watering can.

EASY TO GROW INDOOR SUCCULENTS

Thriller

  • Panda Plant (Kalanchoe tomentosa)

Colors: Fuzzy blue-green leaves

  • Zebra Plant (Zebra haworthia)

Colors: Deep green leaves with white horizontal stripes

Filler

  • Houseleeks (Sempervivum tectorum)

Colors: Green, chartreuse, gold, blue, purple, & burgundy

  • Hens and Chicks (Echeveria species)

Colors: Green, gray-green, silver, black, blue-green, blue, purple, maroon, red, pink, orange, & gold

Spiller

  • Burro’s Tail (Sedum morganianum)

Colors: Green, blue-green, blue, purple, & gray

  • String of Pearls (Senecio rowleyanus)

Colors: Green & variegated white and green

Of course, if you feel adventurous, there are many more exciting succulents to choose from. However, this list provides an extraordinary variety of easy-care, colorful succulents for your first project.

Need more gardening inspiration? Click here.


Related Products

Master Nursery® Bumper Crop® Organic Potting Soil
Eastern & Midwestern Regions
Master Nursery® Bumper Crop® Potting Soil
Western Region

The Benefits of Bare Root

The bare root plant is one of the best-kept secrets in gardening! Bare root plants are woody trees and shrubs, herbaceous ornamental perennials, and even vegetables that are dug, stored, and sold while dormant. They are offered, sans soil and pots, with their (bare) roots exposed.

Bare Root Benefits

There are many benefits of going the bare root route instead of potted plant stock!

  • Better Value
  • Larger Selection
  • Healthier Plant
  • Bigger Root System
  • Easier Planted
  • Earlier Planted
  • Quicker Establishment
  • Faster Growing

Bare root plants cost up to 50% less than the same size plant sold in a pot. There is substantially less labor involved in getting the product to market. Bare root plants are convenient for the grower to store, lightweight for shipping, and do not employ soil or containers. These savings are passed on to the consumer.

Bare Root Fruits
Many ornamental plants are sold bare root; roses are an excellent example. Fruit trees and strawberries, however, tend to be the two most popular edibles offered this way.

Strawberries
At first sight, bare root strawberry plants can look a little scary. Here are a few tips to give you confidence.

  • Bare root strawberries are available in early spring and should be planted immediately after purchase.
  • Examine plants to ensure the foliage is intact, and the root system looks healthy. There should be no presence of mold or foul odors.
  • A well-prepared site is critical! Select a full sun location. Amend the planting site soil deeply with a generous amount of Master Nursery® Bumper Crop® Soil Builder [Eastern & Midwestern Regions | Western Region] or Master Nursery® Bumper Crop® Soil Conditioner [Western Region]
  • Work Master Nursery® Bumper Crop® Tomato and Vegetable Food into the prepared bed following the recommended rate on the packaging.
  • Rehydrate plants. Soak just the strawberry roots in a shallow bucket of fresh water for about 20 minutes.
  • Dig planting holes 18 inches apart, as deep as the roots are long.
  • Spread the root out in the hole and backfill it with the amended soil. Be sure to keep the crown, the central point from which the leaves radiate, at the soil level.
  • Water newly planted strawberries immediately and deeply.
  • Mulch with salt hay or straw to help retain soil moisture.

Fruit Trees
There couldn’t be a more convenient and successful way to plant a fruit tree than bare root. Here’s how it’s done.

  • Like strawberry plants, bare root fruit trees are available in early spring and should be planted immediately after purchase.
  • Store bare root fruit trees in a cool, dry environment until ready to plant.
  • Select a full sun site large enough for your fruit tree to fully mature.
  • Unwrap the tree and gently untangle the roots.
  • To rehydrate, soak tree roots, just the roots, in a bucket of fresh water for 3 – 6 hours.
  • While the tree is soaking, dig a hole at least 3 feet wide at approximately the same depth as the tree was growing before being bare-rooted. The differential color line on the tree trunk will determine the planting depth. The darker portion was underground before uprooting. If the tree has been grafted, the graft should remain 2 inches above the soil level.
  • Mix the excavated soil with a generous amount of Master Nursery® Bumper Crop® Soil Builder [Eastern & Midwestern Regions | Western Region] or Master Nursery® Bumper Crop® Soil Conditioner [Western Region] and create a mound in the planting hole.
  • Following the instructions on the product packaging, mix Master Nursery® Bumper Crop® Starter Food with the backfill soil to give the tree a good start.
  • Place the tree roots on the mound in the planting hole at the correct depth, spreading the roots over the mound. Backfill with the amended soil, gently firming as you do to remove any air pockets.
  • Create a “saucer” with the extra soil, which will help direct water to the root zone and water the plant deeply.
  • Mulch to retain soil moisture.

Wait and be amazed! Whether planting strawberries or fruit trees, you will begin to see signs of life in about a month to 6 weeks. However, be prepared; bare root planting is so easy and affordable that it may become an addiction.

Need more gardening inspiration? Click here.


Related Products

Master Nursery® Bumper Crop® Organic Soil Builder
Eastern & Midwestern Regions
Master Nursery® Bumper Crop® Soil Builder
Western Region
Master Nursery® Bumper Crop® Soil Conditioner
Western Region

Master Nursery® Bumper Crop® Starter Food
Western Region
Eastern & Midwestern Regions
Master Nursery® Bumper Crop® Tomato and Vegetable Food
Western Region
Eastern & Midwestern Regions

Microgreens: The Indoor Salad Garden

“Eat your greens” is good advice, right? Greens are nutritious and rich in vitamins A, C, E, and K. They supply necessary minerals to the diet, such as iron, calcium, magnesium, and potassium. They are an excellent source of fiber and antioxidants. Greens are also low in carbohydrates. The perfect food!

Greens are easy to grow outdoors in the spring, summer, and fall. But what about winter? How does the home gardener ensure a steady supply of this nourishing food during the coldest months of the year?

Introducing Microgreens

Growing produce during the winter is nearly impossible in many parts of the country without a heated greenhouse. The exception is microgreens!

Microgreen Advantages

  • Super Nutritious

Miniscule microgreens pack a powerful nutritional punch in a small package.

  • Space Saving

Their diminutive stature makes them perfect for indoor growing.

  • Convenient

They may be grown right in your kitchen!

  • Easy to Grow

Growing microgreens requires no previous gardening experience.

  • Quick Growing

Turnaround time is generally 1 – 2 weeks.

  • Cost Effective

Expensive to buy at the grocery store but inexpensive to grow at home.

Selecting Microgreens

Just about any greens you typically eat may be grown as microgreens; familiar favorites include arugula, beet, cabbage, chard, kale, lettuce, mustard, radish, spinach, and turnip. There are other plants whose greens may be grown, harvested, and eaten as tasty and nutritious microgreens; this includes amaranth, basil, cauliflower, carrot, celery, chia, parsley, pea, sunflower, and more. Growing a variety is a good idea as each plant type provides a unique flavor and health benefits.

Growing Microgreens

Microgreens are grown densely in a shallow tray and are harvested when young and tender. They are sophisticated, tasty, super healthy, and beautiful, adding additional color and texture to salads, sandwiches, stir-frys, juices, soups, garnishes, and more. As a side note, growing microgreens is the perfect way to introduce children to gardening and good nutrition.

Materials

  • Seed
  • Soil
  • Tray
  • Spray Bottle
  • Scissors

In the tray size of your choice, place about an inch of pre-moistened Master Nursery® Bumper Crop® Potting Soil [Eastern & Midwestern Regions | Western Region], evenly smoothing it out. Generously scatter or sprinkle your chosen microgreen seeds, in a single layer, on the surface of the soil; think of how you would salt and pepper your food. Cover the seeds with a very thin layer of Master Nursery® Bumper Crop® Potting Soil and mist with water to ensure that the seed is well moistened, being careful not to over-water. As microgreens are a quick turnaround crop, fertilization is not necessary.

Place the seeded tray in a sunny location or under grow lights. Covering the tray with a clear dome or plastic wrap will help retain soil moisture but must be removed once the seed germinates. After the clear covering is removed, ensure adequate air circulation.

With fresh water, mist the maturing microgreens a couple of times a day to keep the soil moist but not wet. Turnaround time is as little as three days after seed germination, depending on the plant.

Allow greens to grow to 2 – 4 inches tall and harvest with clean scissors.

Harvested microgreens should be stored in the same manner as full-sized greens and will last just as long in the refrigerator.

Plant a new tray every week for a continuous supply of microgreens.

No matter where you live, in a rural, suburban, or urban location, microgreens may be counted on as an affordable, quick, easy, nutritious year-round crop.

Need more gardening inspiration? Click here.


Related Products

Master Nursery® Bumper Crop® Organic Potting Soil
Eastern & Midwestern Regions
Master Nursery® Bumper Crop® Potting Soil
Western Region